Indian Comfort Food

Those of us with food sensitivities often are confronted with social food situations where we know “if I eat any of this, I’ll be sorry later” . . . but we want to be polite.  So we pick the things that seem “relatively safe.”  I’m pretty good at avoiding the likely culprits.  And lucky for me, I won’t end up in the hospital if I am accidently exposed to gluten, dairy, or corn.  But that doesn’t mean I won’t suffer: intestinal distress (gluten), sinus trouble (dairy), hives (corn).

My choice when I need to rebalance and cleanse my system is what I call Indian Comfort Food, two ayurveda-inspired porridges that soothe and restore: Kichari (aka kitchari, khichdi, and many other variations) and Savory Farina.  Try one or both of these recipes and your body will thank you!  (Recipes adapted from information obtained at an Ayurvedic Cooking class at Health Through Ayurveda.)

Kichari

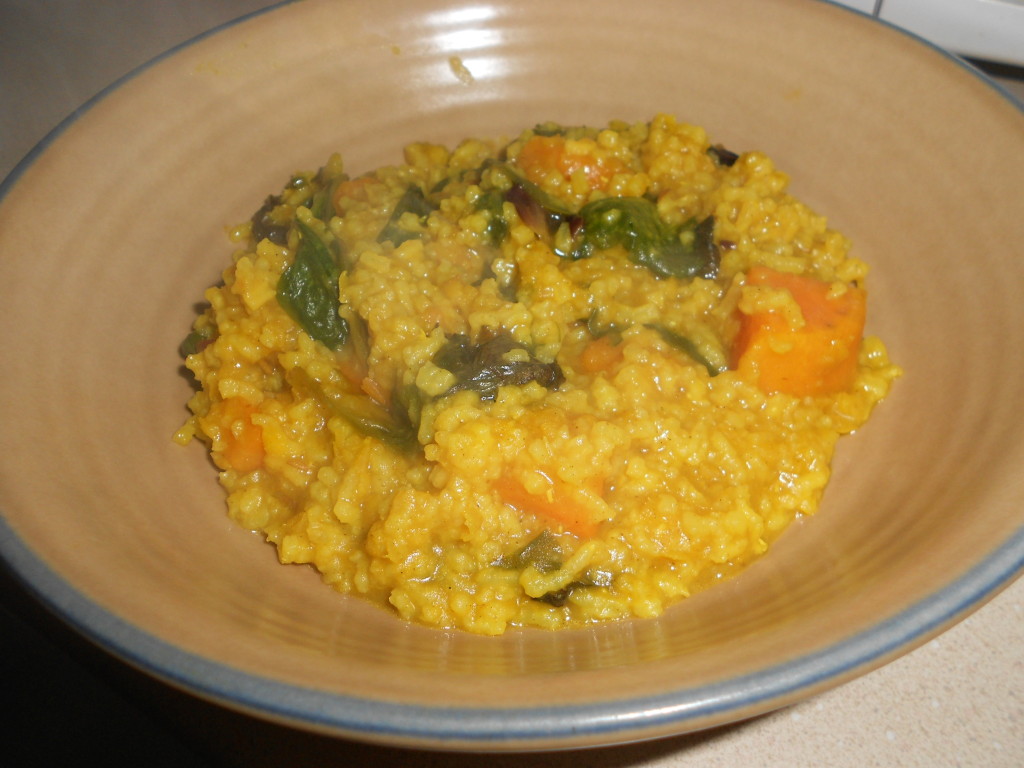
Kichari with Sweet Potato and Chard

Ingredients

  • 1/2 cup split yellow lentils (moong dal) or red lentils (masoor dal)
  • 1 cup white basmati or long-grain rice
  • 6 cups boiling water
  • 1-2 Tablespoons oil or ghee (I use coconut oil)
  • 1 teaspoon cumin seeds
  • 2 Tablespoons fresh ginger, grated
  • 1 pinch baking soda
  • 1 teaspoon ground cumin
  • 1 teaspoon ground coriander
  • 1 teaspoon turmeric
  • 1 cinnamon stick (or 1/2 teaspoon ground cinnamon)
  • 8 cloves (or 1/8 teaspoon ground cloves)
  • 10-12 cardamom pods (or 1/4 teaspoon ground cardamom)
  • 1 large sweet potato, peeled and chopped into bite-sized pieces
  • 4 cups chard (swiss, red, or rainbow, about 1/2 bunch), stems removed, sliced or torn into bite-sized pieces
  • Salt to taste

Directions

  1. Rinse split lentils until water runs clear. Soak 4 hours or overnight; drain and rinse.
  2. Get water boiling if it isn’t already.
  3. Warm oil in large sauce pan or Dutch oven. Add cumin seeds and ginger and sauté for 1 minute. Add drained lentils. Sauté for another few minutes. Add 4 cups of boiling water and pinch of baking soda. Bring to a boil and then turn down heat to low. Cover and simmer for 20 minutes.
  4. Meanwhile measure out remaining spices (cumin, coriander, turmeric, cinnamon, clove, cardamom), prepare sweet potato, and rinse rice.
  5. When beans are mostly cooked (after about 20 minutes), add rice and sweet potatoes. Add remaining 2 cups boiling water.
  6. In a separate small pan, heat 1 Tablespoon oil. Add spices. Warm over low heat just long enough to release aroma. Be careful not to burn.  Add to bean/rice/sweet potato mixture.
  7. Continue cooking at a simmer until rice is done, 20-30 minutes, stirring occasionally.
  8. Add chard. Cook until greens are wilted and combined with the rest of the ingredients (5-10 minutes).
  9. Salt to taste.
  10. Enjoy!

[slideshow_deploy id=’1105′]

Notes

  • The original recipe called for a pinch asafoetida (hing) added with the cumin seeds.  I tried to find hing that didn’t also include gluten and/or corn starch.  Unfortunately, my body reacted to the one product I found that said it was gluten-free in a way that told me there was something in it that I shouldn’t be eating . . . so even though this is a traditional “healling” ingredient in Indian/Ayurvedic cooking, I omit it.
  • If you can’t find small split lentils, you may be tempted to use regular split peas (yellow or green).  Unfortunately, those require MUCH longer to cook.  I’m really not sure how to best modify this recipe to use them.  There may be other kichari recipes on the web that use those larger split peas. (See slideshow above for a picture comparing the different types of lentils.)
  • Kale, spinach, or other leafy greens can be substituted for the chard.
  • Sometimes I heat all the spices at the beginning (with the cumin seed and ginger) rather than waiting until later.  The flavor is a bit different and there’s a greater danger of burning the spices, but it can work (and leaves one less pan to wash and frees up one more burner).
  • The original recipe claimed that this recipe “Serves 2-3.”  I usually get 5-6 serviings out of it.
  • [2021 update] I never figured out what the baking soda was supposed to be doing, so I now omit it and add 1/2 tsp of Ajwain instead. Ajwain is an Indian seed that “tempers the effects of a legume based diet” 🙂

Hearty Breakfast Farina (Uppma)

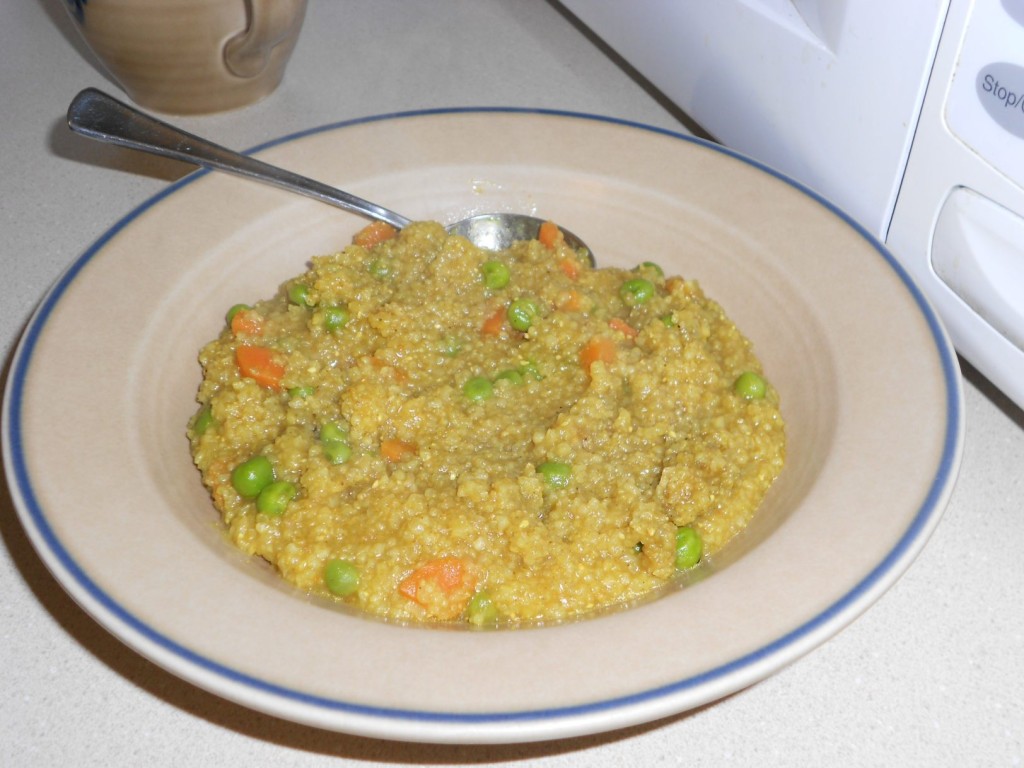
Savory Hot Farina

Ingredients

  • 1 cup boiling water
  • 1/4 cup brown rice farina (I use Bob’s Red Mill “Creamy Brown Rice Farina”)
  • 1/2 cup vegetables (I use 1/4 cup finely chopped carrots and 1/4 cup frozen peas)
  • 1-1/4 tsp Breakfast Spice Blend (see below) (OR 1/2 tsp coriander, 1/4 tsp cumin, 1/4 tsp turmeric, and 1/4 tsp cinnamon)
  • 1 Tablespoon coconut oil or ghee
  • Salt & Pepper to taste

Directions

  1. Start the water boiling in your kettle.
  2. In a small cast iron or non-stick pan over medium heat, lightly the brown rice farina, stirring frequently until the farina is light brown in color.  Remove toasted farina to a bowl and set aside.
  3. Melt the coconut oil or ghee in the pan over low heat.  Add the Spice Blend.  Let spices warm for 10-15 seconds.  Add vegetables and a small amount of water.  Stir. Cover and cook vegetables for 5-7 minutes.
  4. When the vegetables are cooked, add the toasted farina and stir to coat.
  5. Add 1 cup boiling water and a dash of salt.
  6. Cook for approximately 5 minutes, stirring frequently as farina thickens.
  7. Enjoy with a cup of Chai Tea!

Breakfast Spice Blend (makes approx 1/4 cup, enough for 6 individual servings)

  • 2 Tablespoons ground coriander
  • 1 Tablespoon ground cumin
  • 1 Tablespoon ground turmeric
  • 1 Tablespoon ground cinnamon

Combine all the spices in a glass jar.  Use 1-1/4 teaspoons (or a heaping teaspoon) for each serving.

Notes

  • I’ve only made this dish one serving at a time, but it should work if the ingredients are doubled/tripled/quadrupled.  You might need to adjust water quantity, spice quantity, and/or cooking times.  [2021 update] I now always double this recipe (so 2 cups water, 1/2 cup farina, 1 cup veggies, 2-1/2 tsp spice blend all in a slightly larger pan or sauce pan). Works fine and somehow doubling gives me 3 servings instead of two.
  • Other vegetable options: chopped onion, minced ginger, chopped yam or sweet potato, asparagus, leafy greens, or whatever else sounds good.
  • I’m guessing this dish could be made with other grains (e.g., wheat farina or grits), but I haven’t tried that.  You might have to adjust cooking times.
  • [2021 update]  I’ve also made the double recipe with 2 cups of leftover cooked rice instead of the farina (reduce the water).  And I sometimes throw in a couple of scrambled eggs to make a really yummy Rice Bowl.

WOW!  That’s quite a bit of information.  Please let me know (in the comments) if anything needs clarification.

Share

Arroz Verde (Green Rice)

Arroz Verde (aka Green Rice)

Green Rice

adapted from
http://www.penzeys.com/images/B14.pdf (p. 53)
and
http://www.nytimes.com/2010/06/01/health/nutrition/01recipehealth.html

Being gluten-free I eat massive quantities of rice . . . long grain brown rice mostly, but also basmati rice, Thai sweet rice, Arborio rice, short grain brown rice, and even plain old long grain white rice. Needless to say, I keep my eye out for ways to make rice more interesting. Here’s one I really enjoy.  (When I’ve posted about it on Facebook people asked for the recipe . . . so here’s what I actually did.)

Ingredients

  • 2-3 oz. (1-1/2 – 2 cups) bulk spinach, divided (see below)
  • 1/2 cup fresh chopped cilantro
  • 1 Serrano pepper, stem removed (Serranos are the little thin green ones usually sold near the jalapeños; if you can’t find one, use 1/2 a jalapeño, seeded and stem removed; I don’t bother removing the seeds from the Serrano)
  • approximately 2 cups vegetable broth, chicken broth, or water, divided (see below)
  • 1/4 cup vegetable oil
  • 1/2 cup white or yellow onion, diced or minced
  • 2 cloves garlic, minced or pressed
  • 1 cup long grain or basmati rice, rinsed
  • Salt to taste (I use 1/2 to 3/4 teaspoon)

Preparation

  1. Wash and thinly slice 1-1/2 to 2 cups of the spinach. Set aside approximately 1/2 cup to be mixed into the rice AFTER it cooks. Combine the rest of the sliced spinach (1 to 1-1/2 cups) with the cilantro, the Serrano pepper, and 1/2 cup of the broth or water in a food processor, blender, or mini-chopper. Blend until smooth (or well-minced, depending on how you like it). Pour into a liquid measuring cup (or use the markings on the blender) and add broth/water to make 2-1/4 cups total liquid.  Set aside.
  2. Heat the oil over medium-high heat in a medium saucepan with a well-fitting lid. Add the onions and sauté until transparent (approx. 5 minutes). Add the garlic and the rice. Cook, stirring constantly, for 4-5 minutes, until the rice is lightly golden.
  3. Add the broth/vegetable mixture (spinach/cilantro/pepper) and salt. Stir to mix thoroughly. Bring to a boil. Cook for 2-3 minutes.
  4. Lower the heat and simmer, covered, until the liquid is absorbed, about 20-30 minutes. Remove from heat, fluff the rice with a fork, and replace the lid until you are ready to serve. (This rice is easy to burn to the bottom of the pan, so check it at 20 minutes to see how it is cooking.  If it is getting stuck, just turn off the heat and put the lid back on.  It will continue to cook.
  5. Just before serving, stir in the remaining 1/2 cup sliced spinach.

Enjoy!

NOTE: Updated on May 6, 2015 to correct inconsistencies and modify Preparation instructions.  After a few times I found a better way.  The old way worked (if you have that version), but this worked better.

©2014 Lucinda DeWitt

Share

Testing Slideshow with Two Months of Baking

Two months since my last post!  Sorry about that.  It’s not that I haven’t been baking, working on sorting out my food allergies, etc.  I just haven’t had the time or energy to write about it . . . Here’s a slideshow of some of my baking efforts.  I will try to add a few posts to summarize the highlights.

[slideshow_deploy id=’877′]


And a second slideshow of non-baking efforts:

[slideshow_deploy id=’882′]

Share

Quinoa & Sesame Bread

Quinoa & Sesame Bread

gluten-free, dairy-free, corn-free

Inspired by the recipe for “Quinoa Sesame ‘Wonder’ Bread” (in Gluten-Free Makeovers by Beth Hillson, 2011, DaCapo/LifeLong/Perseus Book Group, Cambridge, MA) I bought some quinoa flour and sesame seeds this week. I had no interest in the “Wonder Bread texture” mentioned in the recipe, so rather than using equal parts quinoa/cornstarch/tapioca starch, I added fiber with sorghum and millet flours, and cut back on the starches. (I believe this will also be the first loaf I have made containing NO arrowroot starch, the typical replacement for cornstarch.)

I also noticed that the ingredients and method (of Hillman’s recipe) were very similar to the High Fiber Bread I made a few days ago, so I decided to play a bit with my hand-mixing technique (still no stand mixer). (1) I mixed the yeast in with the other dry ingredients and added slightly warmer water (rather than proofing first) and (2) I borrowed a method from Rose Levy Beranbaum’s The Bread Bible: mixing the dough without salt and letting it rest a bit before adding the salt and additional water. (Salt is known to interfere with the yeast action, so giving the yeast a chance to start working before adding the salt helps with the rising.) I really liked the texture of the dough going into the pan. Finally, to try to avoid the “holey sunken middle” problem, I worked more at smoothing the dough in the pan to remove any possible air pockets.

Ingredients

  • 1 to 2 Tbls sesame seeds
  • 1-1/4 cups quinoa flour
  • 1/2 cup sorghum flour
  • 1/2 cup millet flour
  • 1/2 cup tapioca starch
  • 1/2 cup potato starch
  • 3 Tbls brown sugar
  • 3-1/2 tsp guar gum
  • 2-1/2 tsp active dry yeast
  • 3 eggs, lightly beaten
  • 3 Tbls oil
  • 1-1/8 cup water, warmed to 120°F
  • 1-1/2 tsp salt

Directions

  • Make sure all your ingredients are at room temperature. [I usually measure out my flours into a large bowl, take the eggs and any other refrigerated ingredients out of the frig, and let them sit on the counter while I do something else for 30-60 minutes.]
  • Grease one 8-1/2″ x 4-1/2″ loaf pan.
  • Heat a dry skillet over medium-high heat. Add the sesame seeds and stir continuously until they begin to brown. Remove from the heat and cool.
  • In a large mixing bowl, combine quinoa, sorghum, and millet flours, tapioca starch, potato starch, brown sugar, guar gum, and yeast. Stir/whisk together until everything is evenly combined.
  • Heat the water to 120°F (if you haven’t done that already—see NOTE).
  • In a separate medium bowl, beat together the eggs and the oil.
  • Add approximately 1/2 cup of the water to the dry ingredients. Stir well. Add the egg/oil mixture. Stir well.
  • Sprinkle the sesame seeds over the dough. [I reserved about 1 tsp of sesame seeds for the top of the bread, but the original recipe didn’t do this; we’ll see if they burn in the oven.] Stir everything together. At this point you should have a very rough dry-ish dough that almost holds together. If much loose flour remains in the bowl, add a bit more water and stir. Cover the bowl of dough and let it rest for 5-10 minutes. [This will allow the gum to absorb water and the yeast to start working.]
  • Sprinkle the salt and 1/2 the remaining water over the dough. Stir together. Decide if you need the rest of the water. Add and stir if necessary.
  • Spread the dough into the prepared pan. Use a silicon or oiled spatula to press the dough down and spread evenly in the pan. Spritz the top with a bit of oil and sprinkle any reserved sesame seeds on the top. Cover with oiled plastic wrap and allow to rise in a warm place for 40-60 minutes or until the dough comes almost to the top of the pan.
  • Preheat the oven to 350°F. Bake for 40-45 minutes or until the interior temperature of the bread is 200°F. Turn onto a wire rack and cool completely before slicing.

Note

  • There are a number of common methods for heating the water to the correct temperature (110°F if proofing the yeast separately; 120°F if mixing the yeast in with your other dry ingredients). If your hot water comes out of the tap at 120°F, you can use that; some folks prefer to use filtered water and heat it in the microwave (60 seconds is usually enough to get from room temp to 120°F ; if the water is over 130°F, let it cool before using) [I’m in this camp]; still other folks boil water on the stove and then add cold water to get to the correct temperature. Whichever method you choose, PLEASE use an instant-read thermometer to tell you the temperature. I don’t care if you raised 6 babies and know how to test liquids on your wrist, that may be good enough for babies, but it is NOT good enough for baking bread!!

Pictures

OMG!  This may be my best-looking GF loaf EVER!!

[Later:  I can now confirm that the loaf did NOT sink in the middle and does not have big holes in the center!  Yippee!!—Still need to taste it, but have had 4 slices of bread today, so probably not until tomorrow.]

[Update 3/19/12: I can now verify that this bread makes a yummy sandwich!!  I toasted two slices and made a tuna salad/lettuce/mayo sandwich.  Very tasty!  Except for the top crust (with all the sesame seeds) the bread is neutral in a good way—no overwhelming taste of a particular flour, just a nice hearty loaf.  Definitely NOT the “Wonder Bread” of the original recipe . . . more like a “soft, light, wheat, sandwich bread,” but without the wheat 🙂  Yeah! we’ve got a winner with this recipe! ]

© 2012 Highly Sensitive Girl


Share

G is for GF Granola

GF Granola

GF Granola Recipe

I found this recipe online (site now defunct) and have now made it enough (and tweaked it enough) to call it a winner.  What I love about it are the cranberries soaked in orange juice—YUMMO!  I will admit that I use regular quick oats (rather than special gluten-free oats) . . . those of you with Celiac Disease should make sure to use special gluten-free oats (e.g., Bob’s Red Mill brand) to avoid possible cross-contamination.  My batch is also half the quantity of the original recipe . . . this works better with my baking pan and oven (and is a quantity I can consume before it might get stale).  Also note that this recipe doesn’t contains nuts, but I don’t see any reason why you couldn’t just throw some in.  Play with it and post your results in the comments below!

GF Granola

Prep Time: 20 minutes
Cook Time: 1 hour
Total Time: 1 hour, 20 minutes

Ingredients

  • 3/4 cup dried cranberries
  • 3/4 cup orange juice
  • 3-1/2 cups old-fashioned rolled oats
  • 1/4 cup vegetable oil
  • 1/4 teaspoon salt
  • 1/2 cup whole flaxseed [I partially grind mine in my mini-chopper to make them easier to digest.]
  • 1/4 cup maple syrup
  • 1/4 cup honey
  • 1/4 cup packed brown sugar
  • 1 teaspoon vanilla extract or flavor extract of choice (optional)
  • 1 teaspoon ground cinnamon (optional)
  • 1/4 teaspoon grated nutmeg (optional)
  • 1/4 teaspoon ground ginger (optional)

Preparation

  1. Preheat oven to 350 F. Cover an 18- x 12-inch baking sheet with parchment paper.
  2. In a small saucepan, bring cranberries and orange juice to a boil over medium heat. Reduce heat to warm and simmer for 10 to 15 minutes, or until the cranberries are plump and they have absorbed most of the juice. Drain cranberries, removing as much liquid as you can. (You might try putting the cranberries in a strainer and pressing on them with the back of a spoon.)
  3. In a very large bowl, combine oats, oil, salt and flaxseed. Stir until oats and flaxseed are completely covered with oil. Add maple syrup. Stir to mix completely. Add honey. Stir to mix completely. Add brown sugar, extracts and spices (if using). Stir to mix completely. Add drained cranberries. Stir to mix completely.
  4. Spread oat mixture in an even layer on the baking sheet, smoothing with a spatula. Bake for 15 minutes. Stir mixture thoroughly, being careful to move lower layers of oats to the top and smooth with a spatula. Bake for 15 minutes. Stir again, moving lower layers to the top, then bake for 15 minutes. At this point, the granola should be starting to brown on the top. Continue stirring and baking for 5 minute intervals, being careful not to let the granola burn.
  5. When the entire mixture is toasted and browned, carefully remove the granola to a bowl. Let cool. Store in a sealed container at room temperature. This will last at least two weeks on your countertop or in your pantry. [I put half of this batch in a ziploc freezer back and toss it in the freezer, leaving the other half batch in an airtight canister on the counter.]

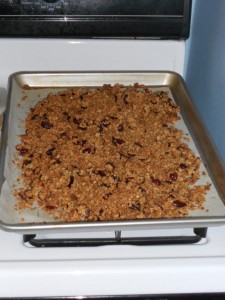
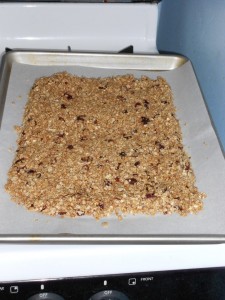
The pics below show the granola before and after baking:

GF Granola

Share