Healing Food from Around the World

Apologies for the long gap between posts.  Still recovering from my “post-surgery incident”.  Still using yoga and food to help with that . . . and improving, slowly, but surely.

Last week I dined on my “Naked Fish Tacos” . . . which are basically pan-grilled fish coated in a chili powder rub served over rice and beans.  My favorite spicy bean recipe can be found here.  I topped it all with an avocado mayo that I mushed up.  Yum!  (These fish tacos are now a regular part of my menus and were inspired by the recipe here.)

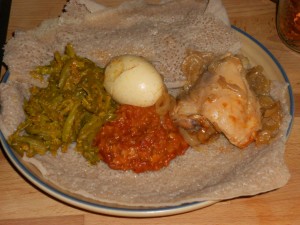
Ethiopian Food Plate

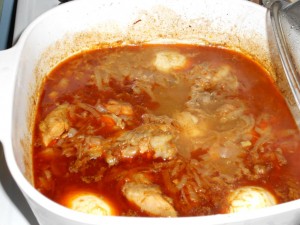
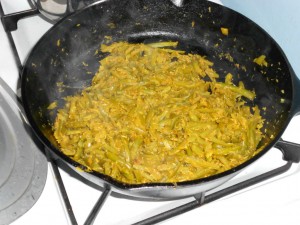
For the past few days I’ve been wanting Ethiopian Food, so last night I whipped up Doro Wat (Chicken Stew), Mesir Wat (Spiced Lentils), and Spicy Green Beans (actually an Indian recipe, but reminds me of spiced green beans I used to get from an Ethiopian place).

Doro Wat (Chicken & Egg Stew)

Spicy Green Beans

Yummo!

I was reminded that in many cultures around the world, the signature dishes are already gluten-free, corn-free, and dairy-free.  I may not be able to travel to these places in person, but I can explore them through food.  I hope you will too!

[Guilty Admission:  I did cheat on my diet last night and ate store-bought injera bread, which in the US contains wheat and barley, rather than just teff.  I tried to make gluten-free injera, but was not successful.  Based on the bloating in my stomach after dinner, I’ll probably have the leftovers with rice instead . . . 🙁  ]

Share

Chicken Stock

My whole grains & lots of vegetables diet is on hold this week due to the required pre-colonoscopy “low roughage diet”.  A bit tricky when the recommended white bread and dairy products are off limits.  For me, the low-roughage diet translates to: banana for breakfast, puréed potato soup for lunch, a dinner of roasted chicken, rice, and overcooked carrots and some organic applesauce for dessert.  The good news is that after roasting the chicken on Sunday, today I get to make chicken stock!  (Which I will need for the day of “clear fluids only” just before the procedure.)

To be honest, my chicken stock recipe is just my veggie stock recipe with a chicken carcass thrown in, but for anyone who wants the details, here they are:

Chicken Stock

  • 2 Tbls canola oil
  • 1 large onion, sliced thinly
  • 4 carrots, peeled and sliced
  • 4 celery ribs, sliced (or about 2 cups of a combination sliced ribs and leaves)
  • 3 cloves garlic, minced
  • large handful of fresh parsley, coursely diced
  • fresh ground black pepper
  • 1 tsp oregano leaves
  • 1 tsp basil
  • 1 tsp thyme
  • 1/2 tsp marjoram
  • 1 chicken carcass (leftover from roasting chicken and removing the major parts)
  • 12 cups water

Sauté the onions, carrots, and celery in the oil until they start to get soft.  Add the garlic, parsley, pepper and herbs.  Stir until fragrant.  Add about half the water and turn up the heat to high.  Slip in the carcass.  Add the remaining water.  Bring to a boil.  Lower to a simmer.  Cook for about 2-3 hours.  Cool.  Remove carcass.  Strain out vegetables.  Strain the broth through a cheesecloth-lined strainer.

Makes 2-3 quarts.

Notes

  • I follow the rule which says if a vegetable is too wilted for you to think about eating it, don’t put it in your stock either.  That doesn’t mean I don’t use stock to clean out the veggie drawer . . . just that I only use veggies that still have the will to live (if they’ve given up and started to go brown, throw them into the compost!).  I also do not include carrot peels or onion skins in my stock.  Some people do.  I don’t.
  • I also discard all of the stuff (meat, veggies, herbs) that has been turning into stock for 3 hours.  You’ve gotten what you could out of it. It’s in the stock. Don’t try to then use those poor overcooked things as the veggies and meat in your soup/stew.  Reserve fresh veggies and other meat parts for that.
  • I know you can buy meat parts specifically for making stock.  I just rarely do that.  One, I mostly make and use vegetable stock.  Two, the only meat stock I make regularly is chicken stock and the carcass works just great for that.  Besides, it gives me a great excuse to roast a chicken.  Yummo! (Feel free to add comments below about how to adapt this recipe to use fresh meat parts.)
  • I sometimes add a peeled, diced potato or two to stock.  Also a bay leaf.  Today I forgot them . . . it will be fine without them.
  • In case you need a great recipe for Roasted Chicken . . . I went a bit simpler this time, but that post contains all you need to know.


Share

Brownies! Sometimes healing requires comfort food . . .

Gluten-Free Brownies

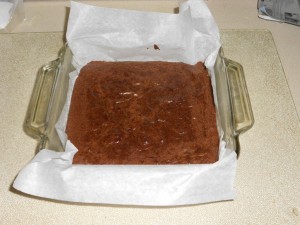
Baked some gluten-free, dairy-free brownies to take to book group tomorrow.

Those of you who know my previous “before-gluten-free” blog will recognize this recipe, but I wanted to repost it here anyway.

Katharine Hepburn’s Brownies

redux:the gluten-free, corn-free, dairy-free edition

I learned of this recipe in Laurie Colwin’s lovely literary cookbook More Home Cooking: A Writer Returns to the Kitchen and have used and adapted it for years.  Now that I’ve tried a version without gluten, corn, or dairy products, I figure I’ve altered it enough to post here.  BTW, technically there’s a bit of corn in the alcohol in the vanilla extract (but I’m already researching recipes for homemade vanilla to get around that in the future!).

Ingredients

  • 1 stick (1/2 cup) butter or shortening [I used Spectrum’s Organic Shortening which is made from palm oil, thus dairy-free]
  • 2 squares (2 oz.) unsweetened baking chocolate
  • 1 cup sugar
  • 2 eggs
  • 1/2 tsp vanilla extract [corn-free if you can find it or make it]
  • 1/2 cup GF flour blend [I used Food Philosopher’s Brown Rice Blend]
  • 1/2 tsp salt
  • 1/2 tsp guar gum or xanthan gum
  • 1 cup chopped walnuts (optional) [I left these out]

Directions

  1. Preheat oven to 325°F.
  2. Grease and flour the bottom and sides of an 8-inch square pan. [For easier brownie removal, especially when making gluten-free brownies, grease the pan and then line with parchment paper wide enough to cover the bottom of the pan and long enough to come up above two sides of the pan.  Once the brownies are cool, you can just lift by the paper handles and remove the whole thing to a board for cutting.]
  3. In the top of a double-boiler (or over very low heat) melt together the butter/shortening and the chocolate.  Once both are completely melted, remove the pan from the heat.
  4. Stir in the sugar and vanilla.  Mix well.
  5. Stir in the eggs.  Mix well.
  6. Stir in the flour, guar gum, and salt. Mix well.
  7. Add nuts if using.
  8. Spread the batter into the prepared pan.  Bake for 40-45 minutes or until toothpick inserted in center comes out clean.  Allow to cool completely before removing, cutting and eating.

Enjoy!

* If you are going corn-free, you are probably aware of the debate surrounding xanthan gum (a thickener made from mold grown on corn which companies using it claim does not contain any corn but which some corn-sensitive folks react to anyway).  If you are concerned use guar gum or omit.


Share

Beets, Yes Beets!!

I know . . . most people HATE beets!  So did I.  When I was growing up, mom would serve them (out of a can, or fresh, boiled and then peeled) . . . the only thing I hated more than beets was lima beans!

Well, I’ve seen the error of my ways.  I also found a couple of recipes that make even beets taste great!  Now I have them every couple of months or so . . . (so, still not my favorite food, but a great way to add some color to your plate).

First, a few notes on preparation . . .

(1) I always peel my beets with a vegetable peeler.  I know other folks recommend other ways (e.g., bake and then rub off the skin) but I’ve never been able to get those to work satisfactorily.

(2) When I work with red beets I wear gloves (either rubber dish gloves or the thin clear vinyl gloves sold at pharmacies), and an apron.  The red juice WILL wash off . . . but it is easier not to get it on you in the first place.

Okay, here are the recipes:

The original Moosewood Cookbook by Mollie Katzen contained what became my regular Thanksgiving meal—”Comprehensively-stuffed Squash” and “A Colorful Accompaniment.”  The “Colorful Accompaniment” was grated beets cooked in orange juice.

Quick Stovetop Beets

  • 2 good-sized (fill your hand) red beets (or several smaller ones)
  • 1 medium carrot
  • 1 Tbls oil (canola or olive)
  • 1 clove garlic, crushed
  • 3/4 cup orange juice
  • salt and pepper to taste

Peel the beets and the carrot (see note on preparation above).  Grate/shred the beets and the carrot (use either the side of your box-grater with the 1/4″ holes or a food processor with a grating attachment).  Heat the oil in a small frying pan over medium heat.  Add the garlic and sauté for a couple of minutes (be careful not to burn it, if you do, start over).  Add the grated beets and carrots.  Sauté for a few more minutes.  Add the orange juice; cook gently 5-10 minutes or until everything is heated through.  Season to taste.  Serve.

Makes 4 servings.

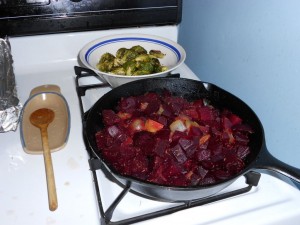
Roasted Beets and Shallots
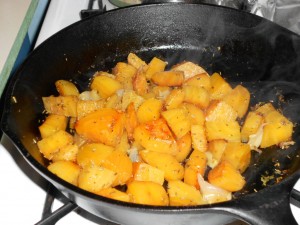
Baked Beets & Shallots (gold)Baked Beets & Shallots (red)

from the Penzey’s Spices catalog (date unknown)

  • 4-6 beets, peeled and cut into large chunks (use red or gold or a combination)
  • 4-6 shallots, peeled (if small, leave whole after peeling, if very large, cut into chunks)
  • 2 tsp. olive oil
  • 2 cloves garlic, minced or crushed
  • 1/2-1 tsp. cracked rosemary
  • 1/4-1/2 tsp. salt, to taste
  • 1/4-1/2 tsp. fresh ground black pepper, or to taste

Preheat oven to 375°F.  Place the beets in a cast iron skillet or heavy metal roasting pan.  Add the shallots, olive oil, garlic, rosemary, salt and pepper.  Toss it all together.  Cover the pan tightly with foil.  Bake at 375°F for 45 minutes or more.  (To test the beets for doneness, poke with a knife or fork.  When they offer little resistance, they’re done.)  Remove the beets from the oven and place in a serving dish.  Pour any juices over the beets and serve.

Makes 4 servings.

Note:  I remove the foil and check the beets after about 30 minutes, if the pan seems dry, I add a few tablespoons of hot water.  Most of the time the beets and shallots make enough juice of their own, but if the foil seal is loose the moisture can escape and the pan can get dry.

 

Share

C is for Carrot-Ginger Soup

C is for Carrot-Ginger Soup . . .

Carrot-Ginger Soup

Here’s a great way to eat more carrots and enjoy a sunny bowl of goodness on a cold January day!

Carrot Ginger Soup

Ingredients

  • 2 Tbls vegetable oil
  • 1 medium onion, thinnly sliced
  • 1 pound carrots, peeled and shredded
  • one 3″ piece of fresh ginger, peeled and grated
  • 1 red potato, peeled and diced
  • 1/3 cup chopped cashews (optional)
  • 1 tsp salt, or to taste
  • 1/2 tsp ground coriander (optional)
  • 1/2 tsp ground cumin (optional)
  • dash ground cinnamon (optional)
  • 1 tsp curry powder (optional)
  • splash orange juice (optional)
  • 4-6 cups vegetable stock (see recipe below for homemade gluten-free veggie stock)

 Directions

  1. Heat the oil in a big soup pot.
  2. Sauté the onions over medium-high heat, stirring occasionally. When the onions start getting tender, add the shredded carrots.  After a few minutes, add the potatoes, ginger, and cashews (if using).  Cook and stir for a few more minutes.  Add the salt and whichever of the other spices suit your fancy.
  3. Once the spices start releasing their aromas, stir in the stock and the orange juice (if using).  Bring to a boil.
  4. Simmer over medium heat for 30 minutes, or until the veggies are all tender.
  5. Remove from heat.
  6. Purée using immersion blender, food processor, or regular blender.

Serve and Enjoy!
Makes 2 quarts

Notes

  • I had not intended to add curry powder, but when I went to add the cinnamon, much more “dashed” out than I had intended and the soup smelled too much like cinnamon.  Adding the curry powder covered it just enough so that it didn’t taste like dessert.  (BTW, both my cinnamon and the curry powder come from Penzey’s Spices . . . check them out for a great herb & spice selection!)
  • Many recipes for carrot soup add some dairy (plain yogurt, half-and-half, sour cream) or coconut milk either at the end of cooking or when serving.  It will help cool the spicy punch of the curry.  I’m avoiding dairy so I omitted it, but feel free to add some if you are able.  The soup tasted fine without it.

Vegetable Stock

  • 2 Tbls oil
  • 1 onion, thinnly sliced
  • 4 large carrots, peeled and sliced
  • 4 ribs celery, diced
  • 4 cloves garlic, minced
  • 2 red potatoes, peeled and diced
  • 1 bay leaf
  • 2 tsp dried basil
  • 2 tsp dried oregano
  • 2 tsp dried thyme
  • salt and freshly ground pepper to taste
  • 10 cups water

Heat the oil in a big soup pot.  Sauté the onions over medium-high heat, stirring occasionally.  When the onions get tender add the carrots and celery.  Cook and stir for a few more minutes.  Add the potatoes and garlic.  Cook and stir.  Add the bay leaf and spices.  Stir to release aroma.  Finally, add the water.  Bring to a boil.  Lower heat to a simmer and cook for 1-1/2 hours.  Cool.  Strain out the vegetables with a slotted spoon.  Place 3-4 layers of cheesecloth in a strainer and strain the stock.

Makes 2 quarts.  Store in frig, use within a few days, or freeze.

Note

  • Most of the time I want a clear stock, so I remove and discard all of the vegetables.  Occasionally, I leave some of them in and purée the stock rather than straining it.  If you do that, remember to locate and remove the bay leaf first!

P.S.  The focaccia in the photo was made using the recipe in Annalise Roberts’ Gluten-Free Baking Classics, 2nd Edition . . . an excellent source for recipes for GF baked goods.  More on my GF baking adventures in a future post.


Share