Extended Thanksgiving

DSCN3900

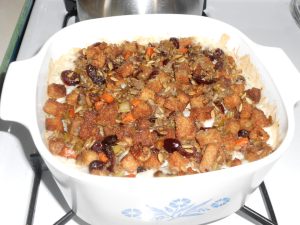
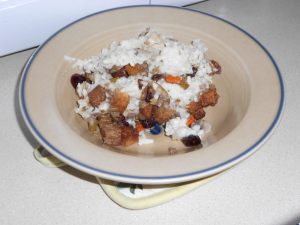
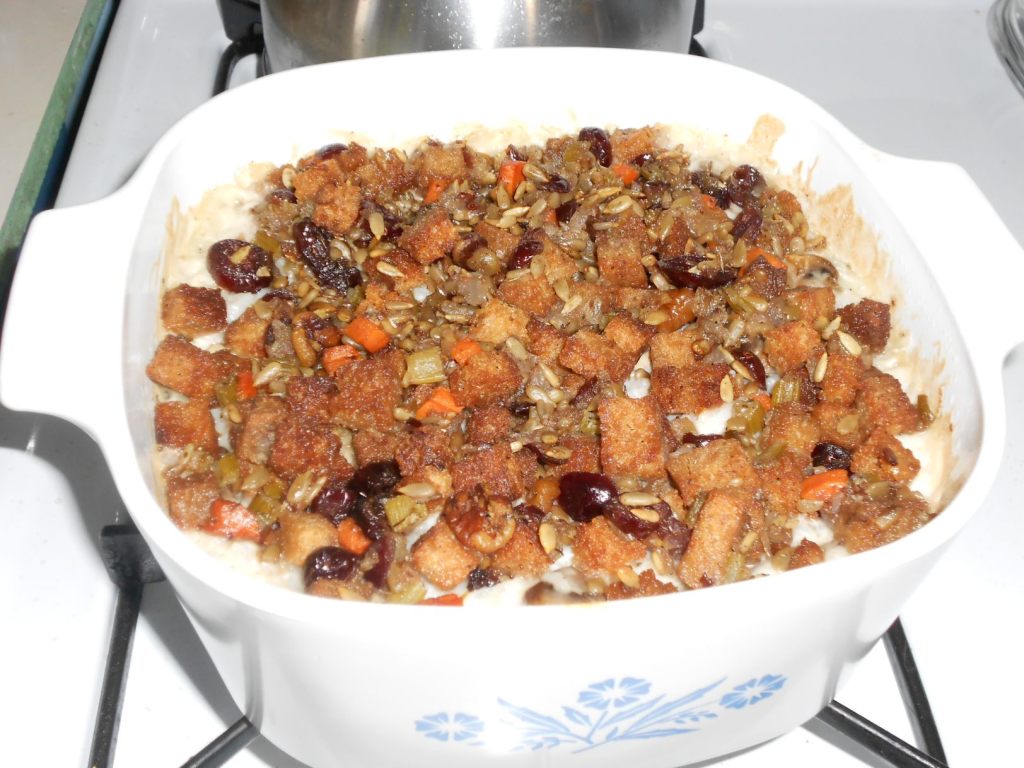
Today I did the last of my “Thanksgiving” cooking, a Turkey, Mushroom, and Rice Casserole using leftover turkey and stuffing.  (This time I even used some leftover gravy and stock!)  But before we get to that recipe, I made myself a list of everything Thanksgiving-related that I cooked since November 23nd (which is when I started the whole process; pacing required due to CFS).  Almost all of these dishes were minor variations of recipes from cookbooks, so the links below are to the cookbooks (unless the recipe was posted online by the author).  Most of the recipes are already gluten-free, but feel free to message me if you want to know the details of how I made them gluten-free, dairy-free, and corn-free.  All were quite delicious (if I do say so myself). 🙂

WHEW!!

 Turkey, Mushroom, and Rice Casserole

Okay, here are the details on adapting my original Turkey, Mushroom, and Rice Casserole to be gluten-free and dairy-free:

Ingredients

  • 2-3 cups cooked turkey, cubed
  • 4-6 oz. mushrooms, chopped
  • 1/2 tsp dried thyme leaves
  • 2-3 Tablespoons vegetable oil
  • 3 cups cooked long-grain white rice (about 1-1/2 cups raw)
  • 3 Tablespoons oil
  • 3 Tablespoons GF Flour Blend
  • 3-4 cups coconut milk and/or stock
  • 1/2 tsp salt
  • 1/4 tsp pepper
  • 1 cup leftover stuffing (made with gluten-free bread; or 1/2 cup GF breadcrumbs toasted in 2 Tbls oil)

Directions

  1. Preheat oven to 350°F.
  2. Saute the chopped mushrooms in oil until they lose their liquid and start to brown lightly. Add the turkey and saute a few more minutes to warm it up. Add thyme and mix thoroughly.
  3. Meanwhile, make a thin white sauce. Melt/heat 3 Tablespoons oil/shortening in a medium sauce pan over low to medium heat. Sprinkle in the GF flour blend 1 Tbls at a time, whisking to combine with the oil and avoid lumps. Cook this roux for 2-3 minutes.  Gradually add the coconut milk/stock (about 1/2 cup at a time), stirring/whisking to avoid lumps. Once all the liquid is added, heat over medium heat, stirring occasionally, until the white sauce coats the back of your spoon. Stir in salt & pepper.
  4. Layer the rice, turkey and mushrooms in a greased casserole dish (2-3 quart size should do it). Pour the white sauce over everything and stir gently to combine.
  5. Top with leftover stuffing or toasted bread crumbs.
  6. Bake in 350°F oven for 30 minutes (covered) then remove the cover for 10-15 minutes to brown the topping.

Enjoy!

Note

  • Today I took the white sauce up a notch by including a big spoon of leftover turkey gravy, mixed in with the roux before adding the coconut milk and stock.  YUMMO!

Copyright © 2014, Lucinda DeWitt


Share

Apple Cake

Apple Cake

gluten-free, dairy-free, vegan, corn-free

DSCN3682

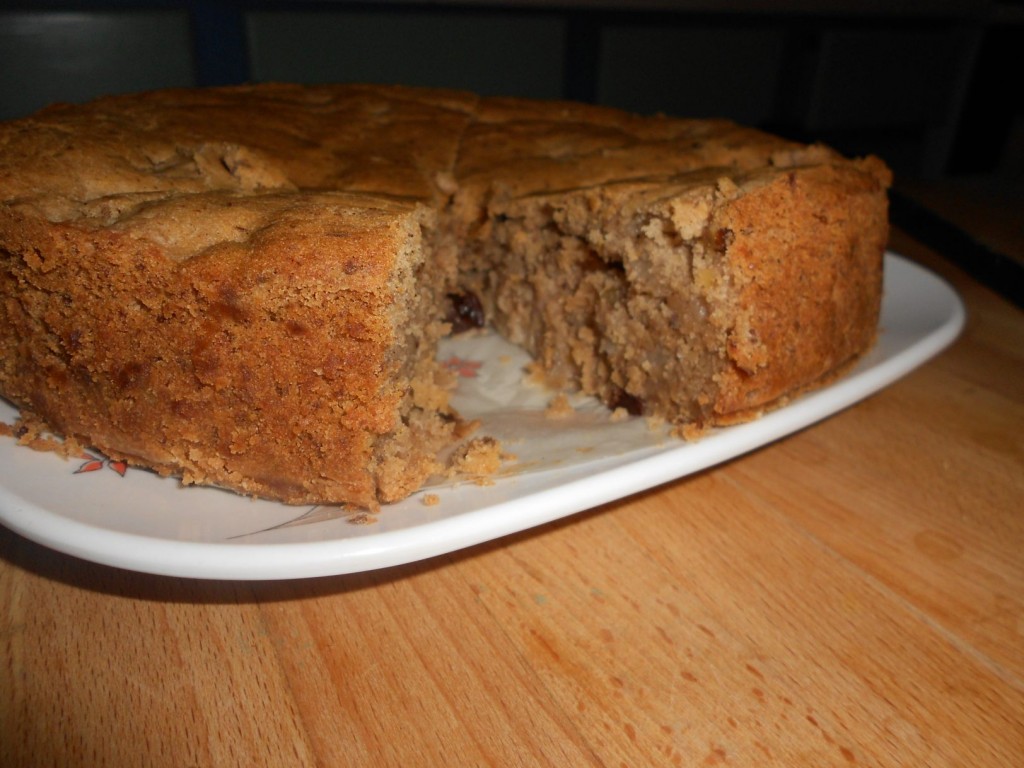
Today I baked the latest in my attempts to develop a gluten-free version of my old favorite “Raw” Apple Cake with Cream Cheese Frosting. This time I used Cybele Pascal’s Allergy Free French Apple Cake as a place to start. Her main innovation is pre-cooking the apples.  I added raisins, walnuts (so no longer “top allergen free”), and spices (so less French, more American) to her recipe and made several other changes to make it corn-free. Below is what I did. Consult the links above for the original recipes.

Ingredients

  • 3 medium baking apples (approx. 1 lb.), peeled, cored, cut into 8 wedges, and then sliced crosswise (I used Cortland apples and ended up with 3 cups of apples)
  • 2 teaspoons brandy (optional; I had Grand Marnier, so used that)
  • 3/4 teaspoon lemon juice
  • 3 Tablespoons flax seed meal
  • 1/2 cup warm water
  • 2 cups Authentic Foods GF Classical Blend or my Basic GF Flour Blend
  • 1/2 teaspoon guar gum
  • 3/4 teaspoon baking soda
  • 1-1/2 teaspoons cream of tartar
  • 1 teaspoon salt
  • 1 teaspoon ground cinnamon
  • 1/2 teaspoon ground allspice
  • 1/4 teaspoon ground cloves
  • 3/4 cup shortening (I use Spectrum Organics Palm Oil Shortening)
  • 3/4 cup firmly packed light brown sugar
  • 1/2 cup granulated sugar
  • 1 teaspoon vanilla extract
  • 3/4 cup diluted coconut milk (see notes below)
  • 1/2 cup walnuts
  • 1/2 cup raisins

Directions

  1. Place apple slices in a microwave-safe pie plate, cover, and microwave 3 minutes or until apples are slightly tender and pliable. Toss with brandy and lemon juice, and set the pie pan on a wire cooling rack to cool.
  2. Preheat oven to 350°F. Line a baking sheet with aluminum foil. Grease a 9-inch springform pan. Line the bottom of the springform pan with a 9″ round piece of parchment paper and grease the parchment paper. Sprinkle the sides and bottom of the pan with a little gluten-free flour mix, tapping out any extra, and place the springform pan on the baking sheet.
  3. In a small bowl, combine flax seed meal with warm water. Set aside for 5-10 minutes, stirring occasionally.  It should thicken into a gel similar in consistency to eggs.
  4. In a medium bowl, whisk together the flour mix, guar gum, baking soda, cream of tartar, salt, cinnamon, allspice, and cloves. Set aside.
  5. In a large bowl (or the bowl of a stand mixer), combine shortening, light brown sugar, and granulated sugar. Mix on medium-high speed until well combined.
  6. Add flax seed mixture and vanilla. Mix until blended.
  7. Reduce the speed to medium and beat in one-third of the flour mixture. Mix until blended.
  8. Add half the coconut milk, mix until blended.
  9. Mix in half of the remaining flour mixture, then the remaining coconut milk, and finally the remaining flour mixture, scraping down the sides of the bowl as necessary.
  10. Using a wooden spoon or rubber spatula, fold in the walnuts and raisins. Then gently fold in the cooled apples.
  11. Pour the batter into the springform pan; spread to the edges of the pan and smooth the top.
  12. Bake for approximately 60-75 minutes in the center of the preheated 350°F oven, until the center of the cake is firm and a toothpick inserted into the cake comes out clean. Cool for 10 minutes on wire rack. Loosen the outside of the springform pan and gently release, using a small knife to separate the edge of the cake from the edge of the pan, if necessary. Set the cake, still on the pan bottom, on a wire rack to cool completely, at least 1 hour.

[slideshow_deploy id=’1036′]

Notes

  • My everyday dairy-free “milk” is diluted coconut milk.  I take a 14 oz. can of Aroy-D Coconut Milk (according to the information on the can this brand is made from only coconut and water, not preservatives or additives), pour it into a 1-quart container, add 14 oz. of water, and shake.  So a 50/50 mixture of coconut milk and water.  Feel free to substitute whatever form/brand of dairy-free milk you like.
  • My original Apple Cake recipe included Cream Cheese Frosting.  I’ve chosen not to frost today’s cake, but if I did I would use the following recipe:

Coconut Manna Frosting

  • 3/4 cup dairy-free shortening
  • 2 heaping Tablespoons Coconut Manna (I use Nutiva Brand)
  • a pinch of salt
  • 2-1/2 – 3 cups of confectioners’ sugar (I use Wholesome Sweeteners Organic Powdered Sugar because it is free of cornstarch)
  • 1 teaspoon vanilla
  • 3 – 4 Tablespoons diluted coconut milk, as needed for smooth consistency

Cream the shortening, coconut manna, salt and vanilla until smooth.  Add the confectioners’ sugar in several batches, beating until smooth after each addition.  Add the coconut milk, one tablespoon at a time until the frosting is the consistency you prefer.  Continue beating until smooth, light, and fluffy.  Makes enough for 12 large cupcakes, an 8″ layer cake, or the top and sides of a 9″ single-layer cake.

©2014 Highly Sensitive Girl / Lucinda DeWitt

Share

Rhubarb Cake

Rhubarb Cake, the gluten-free, dairy-free version

Rhubarb Cake

The original version of this recipe was thought to be a “DeWitt Family Recipe”; but turned out to be an “extended-family recipe”. It was written down by Ruth Smith, my Uncle Dick Dailey’s mother and then passed from my Aunt Rosemary (DeWitt) Dailey to my mother Dolores (Chioccarello) DeWitt. To make it truly inter-generational, I added a touch of my own—walnuts in the topping. Now I’ve revised it to be gluten-free / dairy-free / corn-free. The original made a 9″ x 13″ cake, which is usually too much for just me, so I’ve listed the ingredients for a 9″x9″ version as well.

Ingredients

9″x13″ pan Ingredient 9″x9″ pan
2 cups gluten-free flour blend (see below) 1-1/2 cups
2 teaspoons guar gum 1-1/2 teaspoons
1-1/4 teaspoons baking soda 1 teaspoon
1/2 teaspoon cream of tartar 1/2 teaspoon
1/2 teaspoon salt 1/2 teaspoon
1-1/2 cup brown sugar, packed 1 cup
1/2 cup shortening 6 Tablespoons
2 eggs 1
1 cup coconut milk (diluted 1/2 coconut milk 1/2 water) 3/4 cup
2-3 cups raw rhubarb cut in small pieces 1-1/2 to 2 cups
Topping    
1/2 cup gluten-free flour blend 6 Tablespoons
1/4 teaspoon guar gum 1/4 teaspoon
1/3 cup brown sugar 4 Tablespoons
3/4 teaspoon cinnamon 1/2 teaspoon
2 Tablespoons shortening (softened) 1-1/2 Tablespoons
1/2 cup chopped walnuts (optional) 1/3 cup

Directions

  1. Preheat the oven to 350°. Grease pan. (I also add some parchment paper and then grease that, but it’s not essential.)
  2. In a medium bowl, whisk together the dry ingredients (flour, guar gum, baking soda, cream of tartar, salt). Set aside.
  3. In a small bowl, stir together topping ingredients (flour, guar gum, brown sugar, cinnamon, shortening & nuts). Set aside.
  4. In a large mixing bowl, cream together the shortening and brown sugar. Add egg(s).
  5. Measure out the coconut milk.
  6. To the shortening/sugar mixture, gradually add the dry ingredients alternately with the coconut milk. Mix on low until combined, then for 2-3 minutes on medium speed.
  7. Fold in the rhubarb.
  8. Spread batter into prepared pan. Sprinkle the topping mixture over the batter.
  9. Bake for 40 minutes at 350°F. Cool on a rack.

Enjoy!

NOTE

The Gluten-Free Flour Blend I use most often is from Authentic Foods. It is a blend of superfine brown rice flour (which you can buy separately from Authentic Foods), potato starch, and tapioca starch. If you want to blend your own, the proportions (to make 3 cups) are:

  • 2 cups superfine brown rice flour
  • 2/3 cup potato starch (NOT potato flour)
  • 1/3 cup tapioca starch

Copyright © 2014, Lucinda DeWitt
 

Share

Arroz Verde (Green Rice)

Arroz Verde (aka Green Rice)

Green Rice

adapted from
http://www.penzeys.com/images/B14.pdf (p. 53)
and
http://www.nytimes.com/2010/06/01/health/nutrition/01recipehealth.html

Being gluten-free I eat massive quantities of rice . . . long grain brown rice mostly, but also basmati rice, Thai sweet rice, Arborio rice, short grain brown rice, and even plain old long grain white rice. Needless to say, I keep my eye out for ways to make rice more interesting. Here’s one I really enjoy.  (When I’ve posted about it on Facebook people asked for the recipe . . . so here’s what I actually did.)

Ingredients

  • 2-3 oz. (1-1/2 – 2 cups) bulk spinach, divided (see below)
  • 1/2 cup fresh chopped cilantro
  • 1 Serrano pepper, stem removed (Serranos are the little thin green ones usually sold near the jalapeños; if you can’t find one, use 1/2 a jalapeño, seeded and stem removed; I don’t bother removing the seeds from the Serrano)
  • approximately 2 cups vegetable broth, chicken broth, or water, divided (see below)
  • 1/4 cup vegetable oil
  • 1/2 cup white or yellow onion, diced or minced
  • 2 cloves garlic, minced or pressed
  • 1 cup long grain or basmati rice, rinsed
  • Salt to taste (I use 1/2 to 3/4 teaspoon)

Preparation

  1. Wash and thinly slice 1-1/2 to 2 cups of the spinach. Set aside approximately 1/2 cup to be mixed into the rice AFTER it cooks. Combine the rest of the sliced spinach (1 to 1-1/2 cups) with the cilantro, the Serrano pepper, and 1/2 cup of the broth or water in a food processor, blender, or mini-chopper. Blend until smooth (or well-minced, depending on how you like it). Pour into a liquid measuring cup (or use the markings on the blender) and add broth/water to make 2-1/4 cups total liquid.  Set aside.
  2. Heat the oil over medium-high heat in a medium saucepan with a well-fitting lid. Add the onions and sauté until transparent (approx. 5 minutes). Add the garlic and the rice. Cook, stirring constantly, for 4-5 minutes, until the rice is lightly golden.
  3. Add the broth/vegetable mixture (spinach/cilantro/pepper) and salt. Stir to mix thoroughly. Bring to a boil. Cook for 2-3 minutes.
  4. Lower the heat and simmer, covered, until the liquid is absorbed, about 20-30 minutes. Remove from heat, fluff the rice with a fork, and replace the lid until you are ready to serve. (This rice is easy to burn to the bottom of the pan, so check it at 20 minutes to see how it is cooking.  If it is getting stuck, just turn off the heat and put the lid back on.  It will continue to cook.
  5. Just before serving, stir in the remaining 1/2 cup sliced spinach.

Enjoy!

NOTE: Updated on May 6, 2015 to correct inconsistencies and modify Preparation instructions.  After a few times I found a better way.  The old way worked (if you have that version), but this worked better.

©2014 Lucinda DeWitt

Share

Steamed Collard Green Wraps

Catching up on some recipe-posting while enjoying Baseball Opening Day.

Steamed Collard Greens

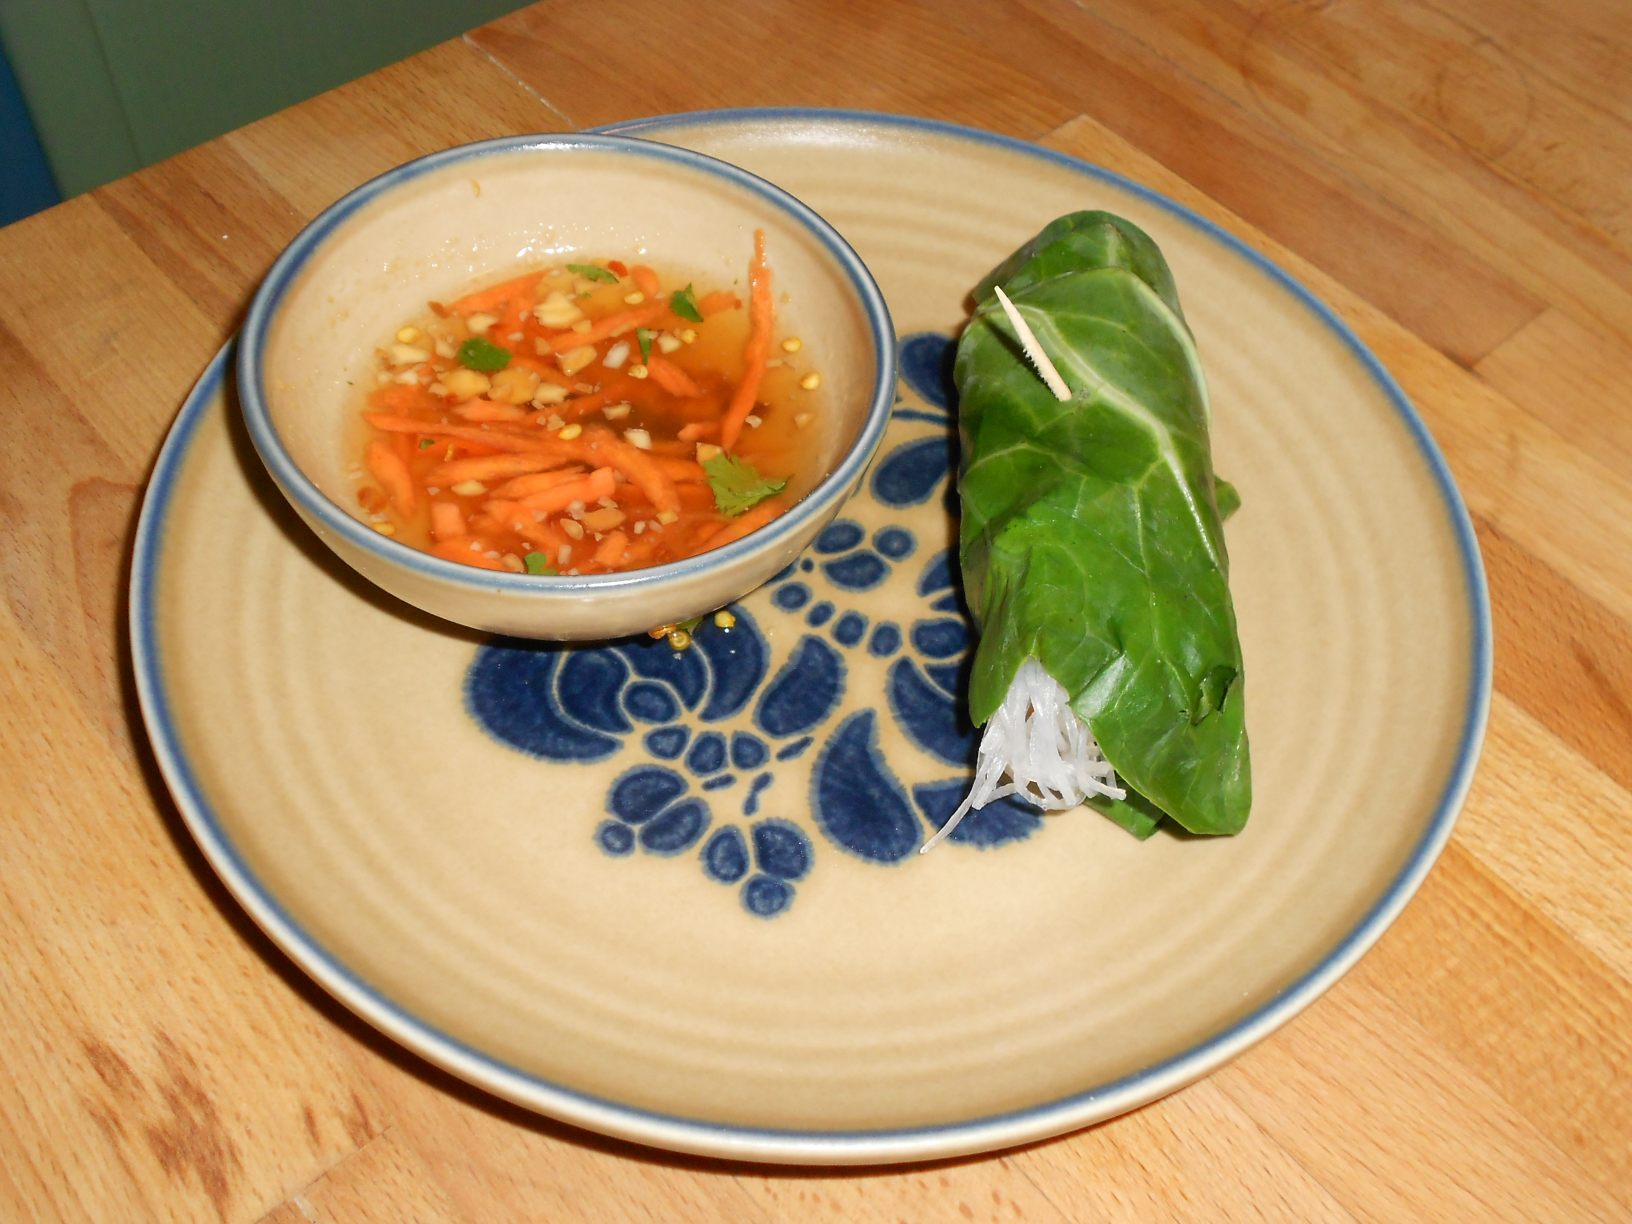
Steamed Collard Wraps

made on March 11, 2014
adapted from Steamed Collard Wraps in The Ayurvedic Vegan Kitchen by Talya Lutzker

My local coop has had the most fabulous greens this winter (chard, kale, collards).  Recently I bought two bunches of collards and then needed to use them.  Here’s what I did with most of them.

Ingredients

1-2 bunches of collard greens (as many leaves as you want wraps); I made 10 wraps

Protein (choose one or more)

  • 8 oz. hummus (homemade or store bought)
  • one 2-oz bundle of bean thread vermicelli, soaked in warm water for 30 minutes, then drained
  • shredded chicken

Vegetables

  • 1 cucumber, julienned or sliced thin with a mandolin
  • 1/2 red onion, julienned
  • 2-3 carrots, grated (use some for dipping sauce below)*
  • 1 avocado, sliced
  • 1 red bell pepper, julienned
  • 3-4 scallions, thinly sliced*
  • 2/3 cup chopped cilantro*

for Dipping Sauce

  • 1/4 c. sugar
  • 1/2 c. water
  • 1/2 c. rice vinegar
  • 1-2 Tablespoons fish sauce
  • 2-3 teaspoons red pepper flakes
  • 2-4 Tablespoons chopped peanuts
  • 2-4 Tablespoons grated carrots*
  • 1-2 Tablespoons chopped cilantro*
  • 1-2 Tablespoons chopped scallions*

Directions

  1. Remove the stems from the collard greens by slicing along each side of the stems so that each leaf is cut in half lengthwise and each half remains intact.
  2. In a large pot with a steamer basket and 1″ of water in the bottom, steam the collard greens for 60-90 seconds each or until just  softened and pliable enough to work with.  Transfer collard greens to a separate bowl or colander.
  3. Create an assembly line with the remaining ingredients, having all in easy reach.
  4. Place 2 collard leaf halves lengthwise on top of each other overlapping a couple of inches along the center.
  5. Place 1-2 heaping tablespoons of your chosen protein at one end.  Top with a few of each of the vegetables.
  6. Carefully fold the end of the collard leaves over the filling and roll like a burrito, folding in the sides as you go.
  7. Secure the wrap with a toothpick to keep it from unrolling.

Make Dipping Sauce*

In a small saucepan combine sugar and water; bring to a boil.  Reduce heat and simmer for about 5 minutes or until sugar is dissolved.  Remove from heat.  Stir in rice wine vinegar, fish sauce, and red chili peppers.  Pour sauce into serving bowl.  Chill, then top with peanuts, carrots, cilantro, and scallions.

Serve collard wraps with the dipping sauce or a creamy cucumber dressing.

Enjoy!

Notes

  • You might want to put some sort of sauce inside the wraps, rather than dipping (or to make the wraps more “portable”.  Just remember that there’s nothing in these wraps to absorb excess moisture.
  • I was hoping for larger wraps, but these are more appetizer size . . . but if you eat 2-3 of them, they can be a meal 🙂

©2014, Lucinda DeWitt

*The dipping sauce recipe was adapted from the Spring Roll Sauce recipe in Keo’s Thai Cusine cookbook by Keo Sananikone

Share