Applesauce Cake (Yes, of course, it’s Gluten-Free & Dairy-Free!)

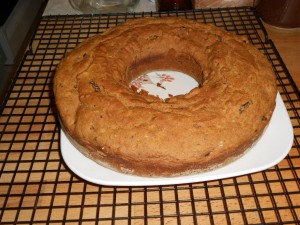
GF Applesauce Cake

Gluten-Free Applesauce Cake

adapted from:
http://www.healthyseasonalrecipes.com/blog-table-of-contents/699-gluten-free-applesauce-snack-cake.html
and
http://glutenfreeislife.wordpress.com/2008/10/01/applesauce-cake-stress/

First made on September 26, 2012

Makes: 15 servings.
Active Time: 20-30 minutes.
Total Time: 1 hour 30 minutes.

Ingredients

  • 2 eggs
  • Zest from 1 orange or lemon
  • 2 cups unsweetened applesauce, preferably homemade
  • 1/3 cup honey
  • 1/3 cup canola oil
  • 2 cups brown rice flour blend
  • 1 teaspoon guar gum
  • 1-1/2 teaspoon baking soda
  • 1/2 teaspoon salt
  • 3/4 teaspoon baking powder
  • 1/2 teaspoon ground cinnamon
  • 1/4 teaspoon ground allspice
  • 1/4 teaspoon ground nutmeg
  • 1/4 teaspoon ground ginger
  • 1/4 teaspoon ground cloves
  • 1/2 cup raisins (optional)
  • 1/2 cup chopped walnuts (optional)

Directions

  1. Preheat oven to 350 degrees F.  Grease a large bundt or tube pan and sprinkle with a dusting of rice flour.
  2. Puree eggs, zest, applesauce, honey and oil in a blender or food processor.
  3. Whisk flour, guar gum, baking powder, baking soda, salt, and spices in a large bowl.
  4. Add the wet ingredients to the dry ingredients. Stir gently until combined. Add raisins and walnuts. Stir to combine.
  5. Spread batter into the prepared pan and smooth to make sure there are no air pockets.
  6. Transfer to the oven. Bake until golden brown and the cake springs back when lightly touched, 45 to 50 minutes.
  7. Let cool in pan 10 minutes before turning out onto a cooling rack.

Note

This cake turned out a bit “denser” than I would like.  Next time I will try to make something more like my Carrot Cake—moister, sweeter, spicier.  Still, this was definitely edible.

Share

Baking Backlog—GF Hamburger Buns

Will be posting several recipes in succession . . . got behind on typing up the recipes.

Gluten-Free Hamburger Buns

Gluten-Free Hamburger Buns

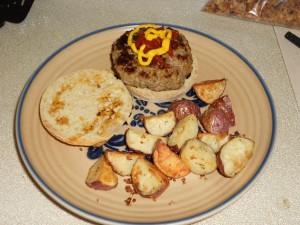
The other day I happened to be browsing the baking section of JoAnn Fabrics and was thrilled to find mini-cake pans and mini-Springform pans (from Wilton).  They looked to be the perfect size for GF Hamburger Buns, so I bought some.  Today I tested them out.  They worked GREAT!!  The 4″ pans make the perfect size bun for a 1/3 pound burger.

I honestly don’t remember the last time I had a burger on a bun before tonight.  What a treat!!

Gluten-Free Hamburger Buns

Makes three 4″ buns; recipe can be doubled.

Equipment

Three 4″ round mini-cake pans (Wilton makes the perfect size)

Ingredients

  • 1/4 cup sorghum flour
  • 1/4 cup millet flour
  • 1/4 cup potato starch (not flour)
  • 1/4 cup tapioca starch
  • 3/4 teaspoon guar gum
  • 1/4 teaspoon salt
  • 1/2 teaspoon unflavored gelatin
  • 1 Tablespoon sugar
  • 1-1/8 teaspoon active dry yeast
  • 1 egg
  • 1-1/2 Tablespoon vegetable oil
  • 1/4 cup + 3 Tablespoons milk (or milk substitute), heated to 115°F

Directions

  1. Make sure all your ingredients are at room temperature.
  2. Grease three 4″ cake pans and dust with rice flour.
  3. Combine all the dry ingredients (flours, guar gum, salt, gelatin, sugar, and yeast) in a medium-large bowl.  Whisk together.
  4. Combine the egg and oil in a small bowl.  Whisk together.
  5. Heat the milk and check the temperature.
  6. Pour the warm milk into the dry ingredients.  Stir to combine.  Add the egg and oil mixture.  Stir to combine.  Beat for approximately three minutes until well combined.
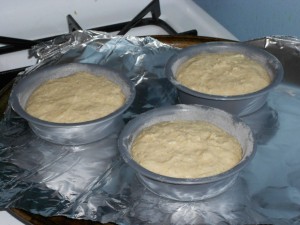
  7. Spoon the dough into the prepared pans.  Spread dough evenly with mini-spatula or knife. Cover gently with a cloth or plastic wrap.  Let rise until double (approximately 40-50 minutes).
  8. Near the end of the rising time, place the oven rack in the center of the oven and preheat the oven to 375°F.
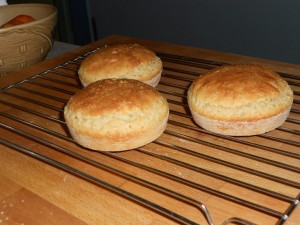
  9. Bake the buns in the preheated oven for 15-20 minutes, or until nicely brown on top and sounding hollow when tapped on top.  Remove buns from oven and turn onto a rack to cool.

NOTES

  • The original recipe (in Gluten-Free Baking Classics by Annalise Roberts) used an electric mixer to combine the ingredients.  I use a Danish Bread Dough Whisk instead.  It works fine.  Just make sure you beat the ingredients thoroughly so that the gum and gelatin have time to start working.
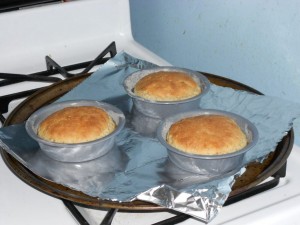
  • The little pans can be difficult to handle.  I placed mine on a cookie sheet lined with aluminum foil for ease of getting into and out of the oven.

©2012 Lucinda DeWitt

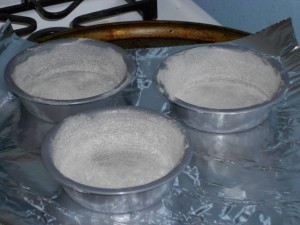
4″ Mini Cake Pans, greased and dusted with rice flour

4" Mini Cake Pans, greased and dusted with rice flour


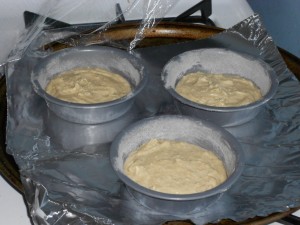
Dough in Pans

Dough in pans


After Partial Rising

After partial rising


After Baking

After baking


Buns Cooling on Rack

Buns Cooling on rack

Share

Too Hot for Cooking!

Apologies for the long break between posts.  The summer heat wave (and my non-air-conditioned kitchen) have brought my GFDFCF cooking experiments to a halt.

I’ve been eating lots of salads . . . green salads, quinoa salads, etc.

My most recent improvised creation was quinoa, zucchini, radishes, carrots, celery, cherry tomatoes, scallions, and some chunks of turkey . . . all coated with an oil and vinegar dressing.

Even my green smoothie adventure was halted when my blender broke! (Good news the replacement part arrived recently, so I can resume with the smoothies. 🙂  )

Today is cool enough that I’m considering making a batch of GFDF Chocolate Chip Cookies (using Annalise Roberts’ recipe from Gluten-Free Baking Classics).

In other news, I attended my first “webinar” a few weeks ago.  The topic was “Post-Exertion Relapse/Post-Exertional Malaise (PEM)” (a common problem/symptom for CFS sufferers).  If you’re interested, you can check it out at the Research 1st website.

Unfortunately, the panel selected for the discussion seemed to have all their eggs in one basket (heart-rate monitoring) and failed to present any evidence that following their recommendations had led to significant improvement in the lives of CFS sufferers.  Still, the talk was interesting and I’m considering purchasing a heart-rate monitor to test out their theory on myself.

Enough for now . . . more recipes soon!

Update:  Did manage to bake the cookies! Yummo!!

GFDF Chocolate Chip Cookies

Share

Marinated Quinoa Salad

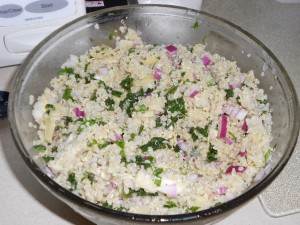
Marinated Quinoa Salad

For years my go-to summer salad was my take on “Marinated Pasta Salad” from Mollie Katzen’s The Enchanted Broccoli Forest cookbook.  Of course, one could modify that recipe to use rice pasta (gluten free) and leave out the mozzarella cheese (dairy free), but for July 4th this year I made a few additional tweaks and came up with Marinated Quinoa Salad.  Many of the same flavors and refreshing taste, but without the food allergies!

Marinated Quinoa Salad

45 minutes to prepare, plus time to chill
Makes 4-6 servings

Ingredients

  • 1 cup dry quinoa, rinsed
  • 2 cups water
  • 1/2 bunch kale
  • 1/2 medium red onion, finely diced
  • 1 jar or can artichoke hearts (8-15 oz., see note below), coarsely chopped
  • 1/2 cup (packed) finely minced parsley
  • 3 Tablespoons olive oil
  • 3 Tablespoons red wine vinegar
  • salt and pepper to taste
  • basil (1 Tablespoon fresh or 1 teaspoon dry) or other herb blend (I used Pasta Sprinkle from penzeys.com)

Directions

  1. In a 1 quart saucepan with a lid, boil the water.  Add the rinsed quinoa, stir, lower the heat, and simmer for 15 minutes or until tender.  Allow the quinoa to cool.
  2. Clean the kale by removing the leaves from the stems.  Rinse the leaves in a bowl of water and tear them into large, bite-size pieces. In a large pot with a lid, heat about one inch of water to boiling.  Add kale and steam/blanch for 2-3 minutes until tender.  Toss with tongs a couple of times during the cooking.  Remove to a bowl of cold water to stop the cooking process.  Drain thoroughly and chop into smaller bite-size pieces.
  3. Add kale, red onion, artichoke hearts, and parsley to quinoa.  Toss.
  4. Add oil, vinegar, salt & pepper, and basil or herbs.  Toss
  5. Chill for at least 30 minutes.

Notes

  • Quinoa is a high-protein, gluten-free grain-like seed gaining in popularity in the US, but ancient in origin.  Several varieties are available.  I buy the dark-beige variety in bulk at the Seward Co-op.  It requires only a quick rinse in a sieve before cooking.  Other varieties may require longer rinsing, soaking, and/or cooking times.  Follow the directions for your quinoa.  You should end up with approximately 2 cups cooked quinoa.
  • Most artichoke hearts seem to be processed with ingredients that are likely to be corn-based (e.g., citric acid, “spices”).  If you are sensitive to corn, use your judgment.  I find that if I drain the marinated artichoke hearts, I don’t have much, if any, reaction.  I haven’t tried the canned variety (with the citric acid), but would drain and rinse those before using. Feel free to substitute some other vegetable (green peppers, broccoli, carrots).
  • You could use the kale raw and be just fine.  I find a few minutes of blanching heightens the color and makes it easier to digest.


Share

GF Carrot Cake Redux

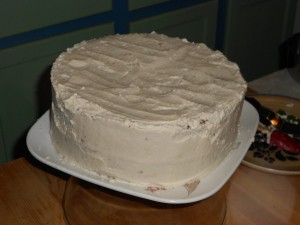
After my successful Carrot Cake BakeOff in March, I decided to combine the best of the two recipes and made a “new and improved” two-layer carrot cake for my birthday.

Gluten-Free Carrot Cake

Full Batch = two 9″ rounds; Half Batch = one 9″ round

Ingredients

Full Batch Ingredient Half Batch
2-1/2 cups Cake & Pastry Blend (see below) 1-1/4 cups
1-1/2 teaspoons baking soda 3/4 teaspoon
1 teaspoon baking powder 1/2 teaspoon
1-1/2 teaspoon cinnamon 3/4 teaspoon
1/4 teaspoon nutmeg 1/8 teaspoon
1/4 teaspoon ground cloves 1/8 teaspoon
1-3/4 cups sugar 7/8 cup
1 cup vegetable oil 1/2 cup
3 eggs eggs 2 eggs [my modification to avoid 1/2 egg]
1 teaspoon pure vanilla extract 1/2 teaspoon
8 oz. can crushed pineapple, drained with juice reserved 4 oz. (1/2 can)
4 Tablespoons reserved pineapple juice 1 Tablespoon [modified due to additional egg noted above]
2 cups peeled & grated carrots 1 cup
3/4 cup raisins 3/8 cup
1/2 cup chopped walnuts 1/4 cup
1/2 cup unsweetened coconut, rehydrated with 1-2 tablespoons of water 1/4 cup

Directions

  1. Preheat the oven to 350°F.  Grease 8- or 9-inch round cake pan(s).  Line with bottom of the pan with parchment. Lightly grease the parchment. [I buy 9″ round  parchment sheets rather than cutting my own.]
  2. Combine the flour blend, baking soda, baking powder, cinnamon, nutmeg, and cloves in a bowl; set aside.
  3. Prepare all the add-ins: carrots, raisins, walnuts, coconut, pineapple.
  4. In a large mixing bowl, beat the sugar, vegetable oil, eggs, and vanilla at low speed until smooth, then beat at high speed for 3 minutes.  Add the flour mixture and beat on low speed to blend.  Add the reserved pineapple juice and beat until smooth.  Stir in the carrots, pineapple, raisins, walnuts, and coconut.  (I do these additions by hand with a wooden spoon, rather than with the mixer.)
  5. Divide the batter between the cake pans.  Bake on the center rack for 40-45 minutes, until the cake begins to pull away from the sides of the pan and a toothpick inserted in the center comes away clean. [Do make sure the center seems “solid” or the whole thing is likely to collapse as it cools.]  Remove to a wire rack and cool for 15 minutes.  Turn the cake out onto a rack to cool completely.  [You may need to run a knife around the edge of the pan.  I also put a sheet of parchment over the rack so the cake doesn’t stick to the rack.]
  6. Frost with non-dairy Coconut Powdered Sugar Frosting (see below) or your favorite frosting.

Note

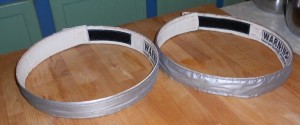
  • I use these velcro cake pan insulating strips to keep the cake from doming.  They work great!  However, it’s possible that without them your cake will be done sooner . . . so remember to start checking after 30 minutes of baking.  Better safe than sorry!


Cake & Pastry Blend

(adapted from Hillson, Gluten-Free Makeovers)

  • 1-1/4 cup sorghum flour
  • 1 cup superfine brown rice flour
  • 1/2 cup tapioca starch
  • 1-1/2 teaspoons guar gum
  • 1/2 teaspoon salt

Whisk all the ingredients together in a bowl.  Store in a plastic zipper bag in the refrigerator until needed.

Notes on Flour Blends:

  • DO NOT use the old “scoop and level” method of measuring with GF flours.  You will get too much flour.  Spoon the flour into your measuring cup, then level off excess with a knife.
  • Obviously, this recipe makes more than the 2-1/2 cups needed for the carrot cake recipe.  Remember to mix the blend, then measure for the recipe.  Save the leftovers for other baking.
  • If you use any other flour blend you will need to add gum and salt to the carrot cake recipe.

Lucinda’s Non-Dairy Coconut Powdered Sugar Frosting

(Update 10/6/2014: I no longer use these proportions in my frosting.  Please see my current recipe at http://highlysensitivegirl.com/hsgblog/2014/10/04/apple-cake/#frosting )

  • 1/2 cup vegetable shortening (I use Spectrum Organics Palm Oil Shortening)
  • 2 Tablespoons Coconut Manna (I use Nutiva brand; https://store.nutiva.com/coconut-manna/)
  • 2-3 cups confectioners sugar; sifted if lumpy
  • 1 teaspoon pure vanilla extract
  • 1/2 teaspoon lemon extract
  • dashes of lemon juice or water or “milk” substitute as needed to thin the frosting
  1. Beat the shortening and coconut manna until light and fluffy.  Add extracts and beat again.
  2. Gradually add confectioners’ sugar and mix at low-medium speed until combined.
  3. Add liquid, one teaspoon at a time, to thin the frosting enough to use.

Notes

  • The coconut manna provides some richness to make up for not using the butter and cream cheese that would be in the traditional version of my powdered sugar frosting.
  • For some reason this recipe wasn’t quite enough to frost the cake today.  Haven’t gotten the proportions correct after years of making cream cheese frosting.  I think this needs more shortening, so next time I’ll try 3/4 cup shortening and maybe an extra spoon of coconut manna.


Share