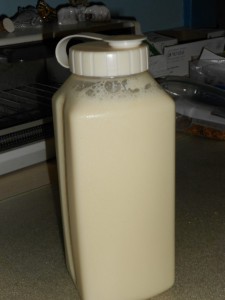
A few weeks ago my favorite soy milk (Edensoy Organic Unsweetened Soymilk made with only soybeans and water) became unavailable, both locally and from the distributor. SO, after trying to live with another brand (which contained additives that gave me headaches) and locating yet another brand (Westsoy Organic Unsweetened) that was only soybeans and water (but cost $4/quart!), I decided to try my hand at making homemade soy milk.
I tried three different methods (though I’ll mention four methods below) with varying degrees of success. I’ll start with the method I liked the best, and then present the other methods with a discussion of what I didn’t like about them.
Some good news: (1) Edensoy Organic Unsweetened Soymilk is now back at my local coop and (2) making your own soy milk can be easy and inexpensive!
Soymilk Method #1—Soak, cook, blend
(adapted from: http://www.tinyurbankitchen.com/2012/02/homemade-soy-milk.html )
You will need:
- 3/4 cup raw soybeans
- water
- 3-qt oven-safe pan with lid
- blender
- Rinse and pick through 3/4 cup of raw soybeans.
- Cover in water and soak for 8-24 hours. (I wouldn’t leave it out of the frig for that long, but a combination of time on the counter and time in the frig is fine. You may also want to change the water depending on how long you soak the beans.)
- Drain the beans. Pick through the soaked beans, removing any “duds” (beans that didn’t expand during soaking). Rinse.
- Put the soaked beans and 6 cups of new water into a 3 qt. oven-safe pan with a lid. Bring to a boil on top of the stove. While the beans are coming to a boil, preheat oven to 350°F. Once the beans come to a boil, transfer the covered pan of beans to the oven. Cook the beans in the oven for 70-90 minutes, or until tender. Remove from oven and let sit on top of the stove in their cooking water until you are ready to blend them. (I would let the cool for at least an hour to avoid the “exploding-blender problem” that can happen if you try to blend something very hot.)
- Drain the beans. Combine 1 cup cooked beans with 2 cups water in in blender. Puree until very smooth. Repeat with remaining beans and water in a ratio of 1 cup beans : 2 cups water. (I wouldn’t put more than that in a blender unless you have a super-turbo-charged type of blender.)
- (optional) Strain the soymilk through strainer sieve.
Enjoy! (Yield: approximately 6 cups)
Soymilk Method #2—Soak, blend, sieve/strain, cook
(adapted from: http://www.tastehongkong.com/recipes/homemade-soy-milk-tricky-yet-easy/ )
You will need:
- 3/4 cup raw soybeans
- water
- blender
- large, 2-3 quart, sauce pan
- colander
- cheesecloth or large, thin, cotton dishtowel
- Rinse and pick through 3/4 cup of raw soybeans.
- Cover in water and soak for 8-24 hours. (I wouldn’t leave it out of the frig for that long, but a combination of time on the counter and time in the frig is fine. You may also want to change the water depending on how long you soak the beans.)
- Drain the beans. Pick through the soaked beans, removing any “duds” (beans that didn’t expand during soaking). Rinse.
- Combine 1 cup of the soaked beans and 2 cups water in a blender. Pureé until smooth.
- Place colander in/over sauce pan and line with cheesecloth/dishtowel.
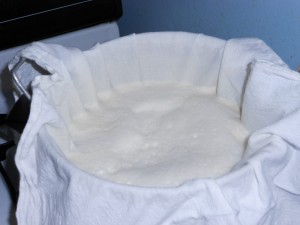
- Pour the foamy bean pureé through the cloth-covered colander. Allow it to drain slowly while you pureé the next batch of beans/water. (See Photo A below.)
- Once all of the bean pureé is poured into the colander, lift all the sides of the cloth, forming a closed bag over the colander, squeeze the remaining soy milk through the cloth and into the sauce pan. When you’ve extracted as much liquid as possible from the pulp, remove the colander and the cloth bag.
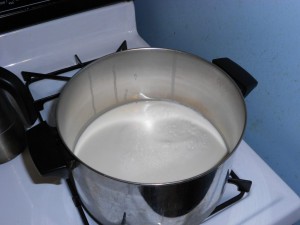
- Over medium heat, bring the soy milk in the sauce pan to a boil. Stir occasionally to avoid scorching and check frequently to avoid “over-foaming” of the pan. Once the soy milk comes to a boil, lower the heat and continue to cook for 15-20 minutes, stirring frequently. (See Photo B below.)
- Serve hot or chilled.
Enjoy! (Yield: approximately 1 quart)
Notes on Method #2
- My main complaint about Method #2 is that the beans don’t seem cooked enough. I don’t digest beans well in the first place, and this soy milk left me with that “gassy discomfort” that can accompany eating beans. (I did not have the same problem with the soy milk I made using Method #1.)
- I’m not entirely sure all the sieving/straining is necessary. I suppose it depends on what you use the milk for and how smooth you want it to be; to me it was too time consuming.
Soymilk Method #3—Soy Milk from Soy Flour
(adapted from: http://www.thumboilseed.com/soy-milk.htm )
I actually tried this method first, thinking it would be quicker and easier . . .
You will need:
- 1 cup soy flour
- water
- large, 2-3 quart, sauce pan
- colander
- cheesecloth or large, thin, cotton dishtowel
- Bring 3 cups water to a boil, then slowly add 1 cup soy flour (do not use toasted soy flour), stirring constantly with a whisk to prevent lumps.
- Reduce heat and simmer for 20 minutes, stirring occasionally.
- Line a colander with cheesecloth and place over a large bowl or pot. Strain the soy flour mixture through the lined colander.
Notes on Method #3
- I allowed the cooked soymilk to cool before I tried straining it.
- Using this method I ended up with only 1 cup of soy milk! The liquid reduced to about 2 cups during cooking and then I had a difficult time getting the cooked mixture through cheesecloth/dishtowel . . .Given the price of soy flour, this is not cheaper than buying soy milk at the store.
Soymilk Method #4—Soak, blend, cook, sieve/strain
I did not try this method, because I didn’t want to mess with straining hot liquid with my hands. Basically, it is the same as Method #3, but you cook the blended soybean mixture first and then strain it afterward. I found this method recommended at: http://kissmyspatula.com/2009/12/20/fresh-homemade-soy-milk/ and http://www.lafujimama.com/2009/09/how-to-make-tofu-no-fancy-equipment/
Final Note: One downside of all these methods is that homemade soy milk doesn’t last very long in the frig (3-4 days before it started tasting “funny”). I only go through about 1 quart/week, so to do all this work every few days seems like too much for me. It’s possible that the soy milk could be frozen, but I haven’t tried that.


