Eggplant Rollups (aka Rollatini)

Eggplant Rollups (aka Rollatini)

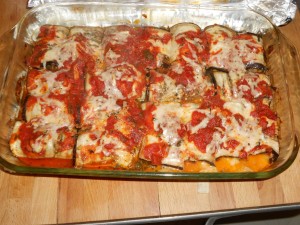
Eggplant Rollups Final

When I heard my family out on the East Coast was having Eggplant Parmesan (aka parmigiana di melanzane, or melanzane alla parmigiana) for Christmas dinner, I got a taste for eggplant . . . only I needed a gluten-free, dairy-free option.  So I searched for “Vegan Eggplant Rollups,” then melded what I found into the following recipe.  For a first try it was amazing!!

Here are the recipes I started with:

http://www.skinnytaste.com/2013/09/best-skinny-eggplant-rollatini-with.html
http://withstyleandgraceblog.com/2011/09/08/eggplant-vegetable-roll-ups-recipe/
http://www.vivaciousdish.com/recipes/cashew-creme-cheese/

And here’s what I actually ended up doing:

Eggplant Rollups

Ingredients

  • 2 medium eggplants
  • 2 Tablespoons oil
  • 1 shallot, thinly sliced
  • 1 clove garlic, minced
  • 2 cups chopped mushrooms
  • 10 ounces frozen spinach, thawed and drained
  • 2 ounces sliced olives (half a 4-ounce can)
  • 1 teaspoon Italian Herb Seasoning (I use Penzey‘s brand which is a blend of oregano, basil, marjoram, thyme, and rosemary)
  • salt and pepper to taste
  • 1 batch cashew cream cheese (see recipe below)
  • 5 ounces Vegan “Mozzarella” Cheese, shredded (I used “Follow Your Heart” brand)
  • 1-1/2 cups tomato sauce (you can find my recipe at http://www.lucindadewitt.com/lucidia/tomato-sauce/ )

Directions

  1. Prepare the mushroom/spinach filling: Heat oil in a large sauté pan over medium-high heat.  Add shallots and garlic and stir until lightly browned, 1-2 minutes.  Add mushrooms and sauté until they release their moisture and start to brown.  Add spinach and olives and cook until heated, stirring frequently.  Add Italian Herb Seasoning and  salt and pepper to taste.
  2. If you haven’t already done so, prepare the Cashew Cream Cheese and heat the tomato sauce.
  3. Thinly slice the eggplant lengthwise.  The slices should be approximately 1/4″ thick.  I used my OXO mandoline slicer set at 1/4″ (though the slices seemed thinner than that).  I ended up with 19 slices from my two eggplants.
  4. Line two cookie sheets with paper towels.  Spread out eggplant on the cookie sheets (it’s okay if they overlap a bit).  Sprinkle both sides of each piece with salt.  Let sit for 15-20 minutes to release moisture (and bitterness).  Pat dry.
  5. Preheat oven to 400°F.  Arrange eggplant on parchment-lined baking sheets.  Season lightly with salt and pepper.  Cover tightly with foil and bake 8-10 minutes until tender and pliable, but NOT fully cooked.
  6. Gather all your prepped ingredients at your assembly area: Eggplant Rollups Prep
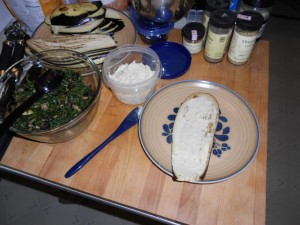
  7. Spread 1/2 cup tomato sauce on the bottom of a 9″x13″ baking dish (glass or ceramic, not metal).
  8. Spread each slice of eggplant with a thin layer of cashew cheese.  Then spread a small amount (approximately 1 Tablespoon) of spinach mixture over the cheese.  Roll up and place seam-side down in baking dish. Eggplant Rollups #2
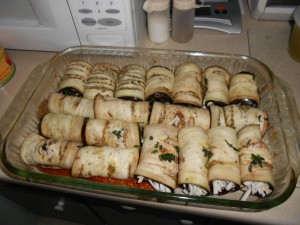
NOTE: I ran out of spinach filling after 15 rollups, so the last four (on the bottom right in the picture) are filled only with cashew cheese & vegan mozzarella.

  1. Once all the rollups are in the dish, top with the remaining tomato sauce and the vegan mozzarella cheese.  Cover tightly with foil. Eggplant Rollups #3
  2. Bake until tender, about 60 minutes.  (I removed the foil for the last 10 minutes to get them nice and browned.)  Remove from oven and let cool 5 minutes before serving. Eggplant Rollups Final
Cashew Cream Cheese
(based on http://www.vivaciousdish.com/recipes/cashew-creme-cheese/ )

Cashew Cream Cheese

NOTE: this is not exactly what I did for Christmas.  I made this recipe again later (to use on pizza!) and liked the second version better, so that is what I’ve written down here.

  • 1 cup raw cashews, soaked in water for 2-4 hours, then drained
  • 1/4 cup water
  • 1 Tablespoon lemon juice
  • 1 teaspoon apple cider vinegar
  • a pinch of sugar
  • a pinch of salt
  • pepper and/or herbs (optional)

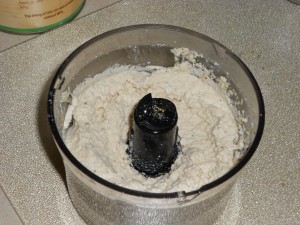
Combine all the ingredients in a food processor or mini-chopper.  Blend until smooth and thickened.  You may need to stop a few times and scrape down the sides of the processor.  These proportions worked well as a spread.  If you want to use this as a “dip,” add more water or some coconut milk (or other non-dairy liquid) until it is the consistency you like.

©2014 Lucinda DeWitt

Share

Best Gluten-Free Vegan Bread EVER!!

I’ve been away from this blog for a long time.  After I was in a car accident in January 2013, I had whiplash, headaches, and dizziness that was aggravated by using the computer . . . so I cut back.  I kept track of my allergen-free cooking in a handwritten journal (and will try to find time to go back and post a few of those recipes).  Today I made a loaf of bread that turned out so great I just had to share the recipe!

GF Vegan Bread


Lucinda’s Best Yet Gluten-Free, Dairy-Free, Egg-Free Bread

baked on October 4, 2013

Now that the summer is over and the house is rather chilly (haven’t turned on the heat yet), it’s time to start baking again.  After several dismal failures in the GF bread department last Spring, I gave up.  Most days I have a chef salad for lunch, so I don’t need bread for a sandwich.  But tomorrow I’m going somewhere and need to take a sack lunch . . . so a sandwich would be convenient.  I decided to combine the best aspects of several recipes and try again.  It turned out GREAT!!

Ingredients

  • 3-1/2 cups GF flours (the combination I used is listed here):
  • 1/2 cup arrowroot starch
  • 3/4 cup tapioca starch
  • 3/4 cup teff flour
  • 3/4 cup sorghum flour
  • 3/4 cup Superfine Brown Rice Flour
  • 3 Tablespoons brown sugar (I used organic coconut palm sugar)
  • 1 Tablespoon guar gum
  • 3 Tablespoons ground flax seeds
  • 1 Tablespoon active dry yeast
  • 1 teaspoon granulated sugar (or honey)
  • 3 Tablespoons oil
  • 1-1/2 teaspoons salt
  • 1/2 teaspoon baking soda
  • 1-7/8 cups warm water (105-110°F), divided

Directions

  1. Have all ingredients at room temperature. Grease a 9×5″ loaf pan.
  2. In a large mixing bowl, combine the GF flours, brown sugar, and guar gum.
  3. In a small bowl, combine the flax seeds and 1/2 cup warm water.  Stir.  Let sit for 5-10 minutes until it thickens and becomes the consistency of beaten eggs.
  4. In a separate small bowl, dissolve the yeast and 1 tsp sugar in 1/2 cup warm water (105-110°F).  Let sit 5 minutes or until frothy.
  5. Add the yeast mixture and flaxseed mixture to the flours.  Stir.  Add oil and 1/4-1/2 cup warm water.  Stir.  Let sit for 5-10 minutes.  (The mixture may still be rather dry.  That’s okay.  It needs to sit to allow the guar gum to start absorbing liquid and the yeast to start growing before you add the final ingredients.)
  6. Add 1/4-1/2 cup warm water, salt, and baking soda.  Stir.
  7. Add 1-2 Tablespoons more warm water as needed to get the dough to come together.  It will be very thick, but no longer dry. ( I used a total of 1-7/8 cups water, but the amount you need may vary.)
  8. Spoon the dough into the prepared pan.  Smooth with a spatula. Sprinkle with oil, cover, and let rise in a warm place until it almost reaches the top of the pan. (40-60 minutes)
  9. When the loaf is almost risen, preheat the oven to 350°F.  (If the loaf was rising in the oven, remove it to the top of the stove and uncover it.)
  10. Bake for 45-50 minutes or until the internal temperature of the loaf is 200°F.
  11. Cool in pan for 10-15 minutes, then transfer the loaf to a wire rack and cool completely before slicing.

Enjoy!

©2013 Lucinda DeWitt

Share

Holiday Cookies

I’ve been baking up a holiday storm full of gluten-free, dairy-free, corn-free, (and a few VEGAN) holiday treats.  Two of the cookie recipes turned out yummy enough to share here (the rest, including my favorite Spritz Cookies, are still “under development”).

The Joyous Ginger Snaps crackle and crunch, just like they should.

The Oatmeal-Craisin Cookies (GF & Vegan) are wholesome and festive.

Enjoy!

Joyous Ginger Snaps (gluten-free and dairy-free)

Ginger Snaps

Adapted from Joy of Cooking (1964/1973) by Irma S. Rombauer and Marion Rombauer Becker and Gluten-Free Baking Classics by Annalise Roberts

“Like ‘boughten’ ones in texture, but with a dreamy flavor.” (JoC, p. 602)
Yield: About 4 Dozen, 2-inch Cookies

Ingredients

  • 6 Tablespoons palm oil shortening
  • 2 teaspoons water
  • 1 cup sugar
  • 1-3/4 cups GF Brown Rice Flour Blend
  • 1/4 cup sweet rice flour
  • 1 teaspoon guar gum
  • 3/4 teaspoon baking soda
  • 1/4 teaspoon salt
  • 1 teaspoon powdered ginger
  • 1/2 teaspoon cinnamon
  • 1/4 teaspoon cloves
  • 1 egg, well-beaten
  • 1/4 cup molasses
  • 1 teaspoon vinegar
  • 2-4 oz. candied ginger pieces, finely chopped
  • granulated sugar

Directions

  1. Preheat oven to 325°.
  2. Cream together shortening, sugar, and 2 teaspoons water.
  3. Stir in egg, molasses, and vinegar.
  4. In a separate bowl, whisk together flours, gum, soda, salt, and dry spices.  Gradually add to shortening mixture.  Mix until blended.
  5. Add candied ginger pieces.  Mix until blended.
  6. Form dough into 1/2-inch to 3/4-inch balls.  Roll each ball in granulated sugar and place on greased cookie sheet.
  7. Bake 14-16 minutes in a 325° oven.  Cool on racks.

“As the ball melts down during baking, the cookie develops the characteristic crinkled surface.” (JofC, p. 602)

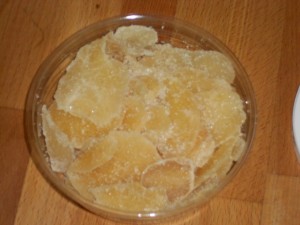
Note: For those unfamiliar with candied ginger, it looks like this before chopping:
Candied Ginger

GF, Vegan Oatmeal-Craisin Cookies

GF Vegan Oatmeal Craisin Cookies

adapted from Bob’s Red Mill Oatmeal Toffee Cookies (from the GF Rolled Oats bag)

Yield: 30 cookies

Ingredients

  • 1 Tablespoon flax meal and 3 Tablespoons water
  • 1 cup GF Brown Rice Flour Blend
  • 1 teaspoon guar gum
  • 1/2 teaspoon baking soda
  • 1/2 teaspoon baking powder
  • 1/2 teaspoon salt
  • 1 teaspoon cinnamon
  • 1/4 teaspoon ground ginger
  • 1/4 teaspoon ground nutmeg
  • 1/2 cup brown sugar
  • 1/2 cup granulated sugar
  • 1/2 cup shortening
  • 1 teaspoon vanilla
  • 2 teaspoons water
  • 1-1/2 cups GF oats (I used half rolled and half quick-oats)
  • 1 cup craisins

Directions

  1. Preheat oven to 350°F.
  2. Combine flax seed and water in a small bowl.  Stir.  Let sit 10 minutes, stirring occasionally.
  3. In a medium bowl, whisk together flour, gum, soda, powder, salt, and spices.
  4. In a large bowl, cream shortening and sugars.
  5. Add flax mix, vanilla, and water.  Beat well.
  6. Add flour mixture.  Mix well.
  7. Stir in oats and craisins (I do this with a wooden spoon rather than the mixer).
  8. On greased (or parchment covered) cookie sheet, place 1 Tablespoon balls of dough spaced 2-3″ apart.  Bake for 18 minutes.  Cool on sheet, then move to rack.


The Gluten-Free Brown Rice Flour Blend I use is:
6 parts Superfine Brown Rice Flour (from Authentic Foods)
2 parts potato starch (not potato flour)
1 part tapioca starch

So, for 3 cups of the blend you would use:
2 cups Superfine Brown Rice Flour
2/3 cup potato starch
1/3 cup tapioca starch


Copyright © 2012 Lucinda DeWitt

Share

Adventures in Soy Milk (or is it Soymilk?)

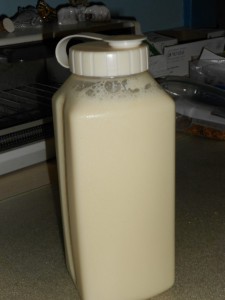
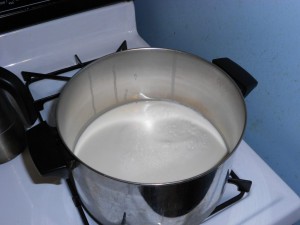
One Quart of Homemade Soy Milk

A few weeks ago my favorite soy milk (Edensoy Organic Unsweetened Soymilk made with only soybeans and water) became unavailable, both locally and from the distributor.  SO, after trying to live with another brand (which contained additives that gave me headaches) and locating yet another brand (Westsoy Organic Unsweetened) that was only soybeans and water (but cost $4/quart!), I decided to try my hand at making homemade soy milk.

I tried three different methods (though I’ll mention four methods below) with varying degrees of success.  I’ll start with the method I liked the best, and then present the other methods with a discussion of what I didn’t like about them.

Some good news: (1) Edensoy Organic Unsweetened Soymilk is now back at my local coop and (2) making your own soy milk can be easy and inexpensive!

Soymilk Method #1—Soak, cook, blend

(adapted from: http://www.tinyurbankitchen.com/2012/02/homemade-soy-milk.html )

You will need:

  • 3/4 cup raw soybeans
  • water
  • 3-qt oven-safe pan with lid
  • blender
  1. Rinse and pick through 3/4 cup of raw soybeans.
  2. Cover in water and soak for 8-24 hours.  (I wouldn’t leave it out of the frig for that long, but a combination of time on the counter and time in the frig is fine.  You may also want to change the water depending on how long you soak the beans.)
  3. Drain the beans.  Pick through the soaked beans, removing any “duds” (beans that didn’t expand during soaking).  Rinse.
  4. Put the soaked beans and 6 cups of new water into a 3 qt. oven-safe pan with a lid.  Bring to a boil on top of the stove.  While the beans are coming to a boil, preheat oven to 350°F.  Once the beans come to a boil, transfer the covered pan of beans to the oven.  Cook the beans in the oven for 70-90 minutes, or until tender.  Remove from oven and let sit on top of the stove in their cooking water until you are ready to blend them.  (I would let the cool for at least an hour to avoid the “exploding-blender problem” that can happen if you try to blend something very hot.)
  5. Drain the beans.  Combine 1 cup cooked beans with 2 cups water in in blender.  Puree until very smooth.  Repeat with remaining beans and water in a ratio of 1 cup beans : 2 cups water.  (I wouldn’t put more than that in a blender unless you have a super-turbo-charged type of blender.)
  6. (optional) Strain the soymilk through strainer sieve.

Enjoy!  (Yield: approximately 6 cups)

Soymilk Method #2—Soak, blend, sieve/strain, cook

(adapted from: http://www.tastehongkong.com/recipes/homemade-soy-milk-tricky-yet-easy/ )

You will need:

  • 3/4 cup raw soybeans
  • water
  • blender
  • large, 2-3 quart, sauce pan
  • colander
  • cheesecloth or large, thin, cotton dishtowel
  1. Rinse and pick through 3/4 cup of raw soybeans.
  2. Cover in water and soak for 8-24 hours.  (I wouldn’t leave it out of the frig for that long, but a combination of time on the counter and time in the frig is fine.  You may also want to change the water depending on how long you soak the beans.)
  3. Drain the beans.  Pick through the soaked beans, removing any “duds” (beans that didn’t expand during soaking).  Rinse.
  4. Combine 1 cup of the soaked beans and 2 cups water in a blender. Pureé until smooth.
  5. Place colander in/over sauce pan and line with cheesecloth/dishtowel.
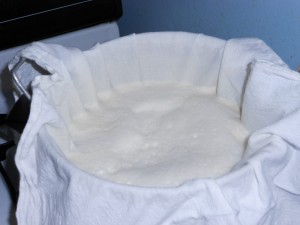
  6. Pour the foamy bean pureé through the cloth-covered colander.  Allow it to drain slowly while you pureé the next batch of beans/water. (See Photo A below.)
  7. Once all of the bean pureé is poured into the colander, lift all the sides of the cloth, forming a closed bag over the colander, squeeze the remaining soy milk through the cloth and into the sauce pan.  When you’ve extracted as much liquid as possible from the pulp, remove the colander and the cloth bag.
  8. Over medium heat, bring the soy milk in the sauce pan to a boil.  Stir occasionally to avoid scorching and check frequently to avoid “over-foaming” of the pan.  Once the soy milk comes to a boil, lower the heat and continue to cook for 15-20 minutes, stirring frequently. (See Photo B below.)
  9. Serve hot or chilled.
Straining the Soy Milk

Photo A: Straining the Soy Milk

Cooking Soy Milk

Photo B: Cooking Soy Milk

Enjoy! (Yield: approximately 1 quart)

Notes on Method #2

  • My main complaint about Method #2 is that the beans don’t seem cooked enough.  I don’t digest beans well in the first place, and this soy milk left me with that “gassy discomfort” that can accompany eating beans.  (I did not have the same problem with the soy milk I made using Method #1.)
  • I’m not entirely sure all the sieving/straining is necessary.  I suppose it depends on what you use the milk for and how smooth you want it to be; to me it was too time consuming.

Soymilk Method #3—Soy Milk from Soy Flour

(adapted from: http://www.thumboilseed.com/soy-milk.htm )

I actually tried this method first, thinking it would be quicker and easier . . .

You will need:

  • 1 cup soy flour
  • water
  • large, 2-3 quart, sauce pan
  • colander
  • cheesecloth or large, thin, cotton dishtowel
  1. Bring 3 cups water to a boil, then slowly add 1 cup soy flour (do not use toasted soy flour), stirring constantly with a whisk to prevent lumps.
  2. Reduce heat and simmer for 20 minutes, stirring occasionally.
  3. Line a colander with cheesecloth and place over a large bowl or pot. Strain the soy flour mixture through the lined colander.

Notes on Method #3

  • I allowed the cooked soymilk to cool before I tried straining it.
  • Using this method I ended up with only 1 cup of soy milk!  The liquid reduced to about 2 cups during cooking and then I had a difficult time getting the cooked mixture through cheesecloth/dishtowel . . .Given the price of soy flour, this is not cheaper than buying soy milk at the store.

Soymilk Method #4—Soak, blend, cook, sieve/strain

I did not try this method, because I didn’t want to mess with straining hot liquid with my hands.  Basically, it is the same as Method #3, but you cook the blended soybean mixture first and then strain it afterward.  I found this method recommended  at: http://kissmyspatula.com/2009/12/20/fresh-homemade-soy-milk/  and  http://www.lafujimama.com/2009/09/how-to-make-tofu-no-fancy-equipment/

Final Note:  One downside of all these methods is that homemade soy milk doesn’t last very long in the frig (3-4 days before it started tasting “funny”).  I only go through about 1 quart/week, so to do all this work every few days seems like too much for me.  It’s possible that the soy milk could be frozen, but I haven’t tried that.


Share

Cranberry Pecan Salads

Cranberry Pecan Salads

In September 2012, I trekked 25 miles to Valley Natural Foods in Burnsville, MN to get some gluten-free flour.  While there, I discovered what a great selection of gluten-free and dairy-free items they have, including items in the deli counter (clearly labeled as GF and DF!).  Needless to say, I came home with much more than my GF Superfine Brown Rice Flour.  Two of the deli salads were particularly yummy—Cranberry Chicken Salad and Raw Squash Salad with Craisins and Pecans.  Tonight I made a variation of my own, Spaghetti Squash with Craisins and Pecans, though at the last minute mine became a hot dish rather than a salad.  So here are three variations on the “Salad/Side-dish with Cranberries and Pecans,” beginning with the dish I made tonight, followed by my the Valley Foods dishes.

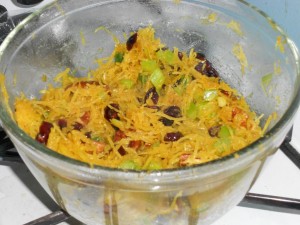
Spaghetti Squash with Craisins and Pecans

Spaghetti Squash with Craisins and Pecans

  • 1/2 spaghetti squash, seeded & baked (see note below on spaghetti squash)
  • 1 rib celery, diced
  • 1 scallion, finely sliced
  • 1/3 cup craisins
  • 1/3 cup pecans
  • 1/2 teaspoon curry powder
  • dash of paprika
  • salt & pepper to taste

Using a fork, remove the flesh from the squash.  (As the name implies, it will come out in spaghetti-like strands, you may wish to cut them into smaller, bite-sized pieces.) In a medium bowl, combine all the ingredients.  Toss together.  Enjoy!

Notes

  • I used leftover spaghetti squash baked as I bake most squash: cut in half lengthwise, remove seeds and pulp (but not the “flesh”) of the squash, spray the raw side lightly with oil, place raw side down on a baking sheet.  In a 375°F oven, bake for 45-60 minutes (or until fork tender), remove, allow to cool. Enjoy!
  • Tonight I decided I wanted this dish hot, rather than cold.  I tossed together the ingredients without the craisins and pecans, heated the squash mixture in a bit of oil in a medium sauté pan until the spices were fragrant, then added the craisins and pecans, tossed and ate with rice.
  • I can think of many variations on this dish:  add a diced apple, change out the curry powder for “poultry seasoning” (a mixture of sage, rosemary, thyme, and marjoram), etc.  The curry powder and the texture of the squash actually made this dish taste like “Singapore noodles,” so I can imagine swapping the cranberries and pecans for carrots, bean sprouts and bok choy.  The possibilities are endless!!

Raw Squash Salad with Craisins and Pecans

from http://valleynaturalfoods.com/wordpress/2010/12/06/favorite-holiday-recipes/

  • 3/4 C. chopped pecans
  • 2-1/2 lbs. finely shredded raw butternut squash (peeled and seeded first)
  • 1 C. finely diced yellow onion
  • 2 C. craisins (dried cranberries)
  • 1/3 C. freshly chopped cilantro
  • 1-1/2 Tbsp. ground coriander
  • 1-1/2 Tbsp. ground cumin
  • 1/2 Tbsp. sea salt, or to taste

Place pecans in a bowl and cover with water. Allow pecans to soak at room temperature for 1 hour. Shred squash in food processor fitted with fine shredding blade, or shred by hand with grater (should appear small and “rice” like). Drain water off pecans and combine with squash and remaining ingredients. Toss well and chill before serving.

Cranberry Pecan Chicken Salad

(I couldn’t find the actual Valley Natural Foods recipe for this salad, so I used the ingredients list from the deli container and adapted a recipe found at http://www.annies-eats.com/2009/07/15/cranberry-pecan-chicken-salad/  )

Ingredients

  • 4 cups of cubed cooked chicken
  • 1 cup toasted pecans, coarsely chopped
  • 1 rib celery, finely diced
  • 2-4 tbsp. finely minced shallot or scallion
  • 1 cup dried cranberries
  • 1/3 cup light mayonnaise
  • 2 tbsp. minced flat-leaf parsley
  • 1/2 tsp. salt
  • 1/2 tsp. pepper

Directions

Combine all ingredients in large mixing bowl.  Mix well until thoroughly combined.  Adjust seasonings to taste.  Refrigerate for 30 minutes or more to allow flavors to meld.  Serve.


Enjoy these recipes!  Have fun with them and report and interesting variations in the comments.

Share