Eggplant Rollups (aka Rollatini)

Eggplant Rollups (aka Rollatini)

Eggplant Rollups Final

When I heard my family out on the East Coast was having Eggplant Parmesan (aka parmigiana di melanzane, or melanzane alla parmigiana) for Christmas dinner, I got a taste for eggplant . . . only I needed a gluten-free, dairy-free option.  So I searched for “Vegan Eggplant Rollups,” then melded what I found into the following recipe.  For a first try it was amazing!!

Here are the recipes I started with:

http://www.skinnytaste.com/2013/09/best-skinny-eggplant-rollatini-with.html
http://withstyleandgraceblog.com/2011/09/08/eggplant-vegetable-roll-ups-recipe/
http://www.vivaciousdish.com/recipes/cashew-creme-cheese/

And here’s what I actually ended up doing:

Eggplant Rollups

Ingredients

  • 2 medium eggplants
  • 2 Tablespoons oil
  • 1 shallot, thinly sliced
  • 1 clove garlic, minced
  • 2 cups chopped mushrooms
  • 10 ounces frozen spinach, thawed and drained
  • 2 ounces sliced olives (half a 4-ounce can)
  • 1 teaspoon Italian Herb Seasoning (I use Penzey‘s brand which is a blend of oregano, basil, marjoram, thyme, and rosemary)
  • salt and pepper to taste
  • 1 batch cashew cream cheese (see recipe below)
  • 5 ounces Vegan “Mozzarella” Cheese, shredded (I used “Follow Your Heart” brand)
  • 1-1/2 cups tomato sauce (you can find my recipe at http://www.lucindadewitt.com/lucidia/tomato-sauce/ )

Directions

  1. Prepare the mushroom/spinach filling: Heat oil in a large sauté pan over medium-high heat.  Add shallots and garlic and stir until lightly browned, 1-2 minutes.  Add mushrooms and sauté until they release their moisture and start to brown.  Add spinach and olives and cook until heated, stirring frequently.  Add Italian Herb Seasoning and  salt and pepper to taste.
  2. If you haven’t already done so, prepare the Cashew Cream Cheese and heat the tomato sauce.
  3. Thinly slice the eggplant lengthwise.  The slices should be approximately 1/4″ thick.  I used my OXO mandoline slicer set at 1/4″ (though the slices seemed thinner than that).  I ended up with 19 slices from my two eggplants.
  4. Line two cookie sheets with paper towels.  Spread out eggplant on the cookie sheets (it’s okay if they overlap a bit).  Sprinkle both sides of each piece with salt.  Let sit for 15-20 minutes to release moisture (and bitterness).  Pat dry.
  5. Preheat oven to 400°F.  Arrange eggplant on parchment-lined baking sheets.  Season lightly with salt and pepper.  Cover tightly with foil and bake 8-10 minutes until tender and pliable, but NOT fully cooked.
  6. Gather all your prepped ingredients at your assembly area: Eggplant Rollups Prep
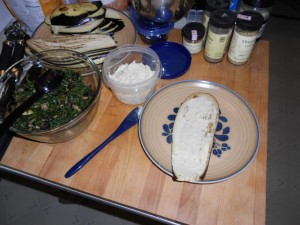
  7. Spread 1/2 cup tomato sauce on the bottom of a 9″x13″ baking dish (glass or ceramic, not metal).
  8. Spread each slice of eggplant with a thin layer of cashew cheese.  Then spread a small amount (approximately 1 Tablespoon) of spinach mixture over the cheese.  Roll up and place seam-side down in baking dish. Eggplant Rollups #2
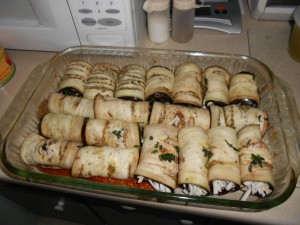
NOTE: I ran out of spinach filling after 15 rollups, so the last four (on the bottom right in the picture) are filled only with cashew cheese & vegan mozzarella.

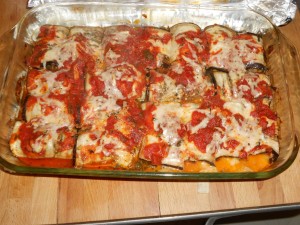
  1. Once all the rollups are in the dish, top with the remaining tomato sauce and the vegan mozzarella cheese.  Cover tightly with foil. Eggplant Rollups #3
  2. Bake until tender, about 60 minutes.  (I removed the foil for the last 10 minutes to get them nice and browned.)  Remove from oven and let cool 5 minutes before serving. Eggplant Rollups Final
Cashew Cream Cheese
(based on http://www.vivaciousdish.com/recipes/cashew-creme-cheese/ )

Cashew Cream Cheese

NOTE: this is not exactly what I did for Christmas.  I made this recipe again later (to use on pizza!) and liked the second version better, so that is what I’ve written down here.

  • 1 cup raw cashews, soaked in water for 2-4 hours, then drained
  • 1/4 cup water
  • 1 Tablespoon lemon juice
  • 1 teaspoon apple cider vinegar
  • a pinch of sugar
  • a pinch of salt
  • pepper and/or herbs (optional)

Combine all the ingredients in a food processor or mini-chopper.  Blend until smooth and thickened.  You may need to stop a few times and scrape down the sides of the processor.  These proportions worked well as a spread.  If you want to use this as a “dip,” add more water or some coconut milk (or other non-dairy liquid) until it is the consistency you like.

©2014 Lucinda DeWitt

Share

Best Gluten-Free Vegan Bread EVER!!

I’ve been away from this blog for a long time.  After I was in a car accident in January 2013, I had whiplash, headaches, and dizziness that was aggravated by using the computer . . . so I cut back.  I kept track of my allergen-free cooking in a handwritten journal (and will try to find time to go back and post a few of those recipes).  Today I made a loaf of bread that turned out so great I just had to share the recipe!

GF Vegan Bread


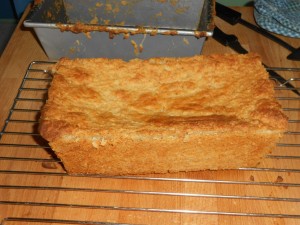
Lucinda’s Best Yet Gluten-Free, Dairy-Free, Egg-Free Bread

baked on October 4, 2013

Now that the summer is over and the house is rather chilly (haven’t turned on the heat yet), it’s time to start baking again.  After several dismal failures in the GF bread department last Spring, I gave up.  Most days I have a chef salad for lunch, so I don’t need bread for a sandwich.  But tomorrow I’m going somewhere and need to take a sack lunch . . . so a sandwich would be convenient.  I decided to combine the best aspects of several recipes and try again.  It turned out GREAT!!

Ingredients

  • 3-1/2 cups GF flours (the combination I used is listed here):
  • 1/2 cup arrowroot starch
  • 3/4 cup tapioca starch
  • 3/4 cup teff flour
  • 3/4 cup sorghum flour
  • 3/4 cup Superfine Brown Rice Flour
  • 3 Tablespoons brown sugar (I used organic coconut palm sugar)
  • 1 Tablespoon guar gum
  • 3 Tablespoons ground flax seeds
  • 1 Tablespoon active dry yeast
  • 1 teaspoon granulated sugar (or honey)
  • 3 Tablespoons oil
  • 1-1/2 teaspoons salt
  • 1/2 teaspoon baking soda
  • 1-7/8 cups warm water (105-110°F), divided

Directions

  1. Have all ingredients at room temperature. Grease a 9×5″ loaf pan.
  2. In a large mixing bowl, combine the GF flours, brown sugar, and guar gum.
  3. In a small bowl, combine the flax seeds and 1/2 cup warm water.  Stir.  Let sit for 5-10 minutes until it thickens and becomes the consistency of beaten eggs.
  4. In a separate small bowl, dissolve the yeast and 1 tsp sugar in 1/2 cup warm water (105-110°F).  Let sit 5 minutes or until frothy.
  5. Add the yeast mixture and flaxseed mixture to the flours.  Stir.  Add oil and 1/4-1/2 cup warm water.  Stir.  Let sit for 5-10 minutes.  (The mixture may still be rather dry.  That’s okay.  It needs to sit to allow the guar gum to start absorbing liquid and the yeast to start growing before you add the final ingredients.)
  6. Add 1/4-1/2 cup warm water, salt, and baking soda.  Stir.
  7. Add 1-2 Tablespoons more warm water as needed to get the dough to come together.  It will be very thick, but no longer dry. ( I used a total of 1-7/8 cups water, but the amount you need may vary.)
  8. Spoon the dough into the prepared pan.  Smooth with a spatula. Sprinkle with oil, cover, and let rise in a warm place until it almost reaches the top of the pan. (40-60 minutes)
  9. When the loaf is almost risen, preheat the oven to 350°F.  (If the loaf was rising in the oven, remove it to the top of the stove and uncover it.)
  10. Bake for 45-50 minutes or until the internal temperature of the loaf is 200°F.
  11. Cool in pan for 10-15 minutes, then transfer the loaf to a wire rack and cool completely before slicing.

Enjoy!

©2013 Lucinda DeWitt

Share

Resilience

Resilience . . .

  • The action or an act of rebounding or springing back; rebound, recoil. Obs.
  • The quality or fact of being able to recover quickly or easily from, or resist being affected by, a misfortune, shock, illness, etc.; robustness; adaptability.

I keep encountering the concept of resilience . . . in reading, in a sermon, online.  After reading a number of stories about people “springing back” after trauma, I was starting to believe that I just didn’t have any, or that it had been drilled out of me at a young age.  There are certainly many areas of my life in which I give up after the smallest failure or set back.

Just when I was sure that resiliency was either something one had or something one didn’t have (and that I just didn’t have it), I had the following “Aha!” experience:

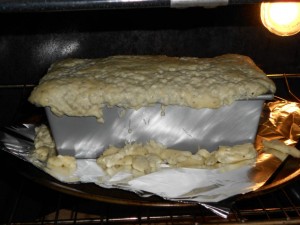
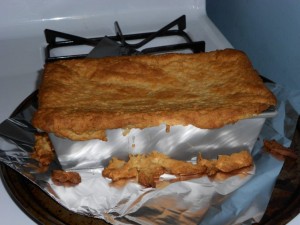
I baked what must be at least my 30th loaf of gluten-free bread.  Like many loaves before it (though not all), it was a mess:

GF Vegan Sandwich BreadGF Vegan Sandwich Bread

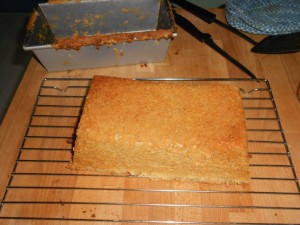
I did what I could with it, and the result was this:

GF Vegan Sandwich BreadGF Vegan Sandwich Bread

Probably edible, I don’t know yet.

What I realized was that one area where I DO seem to have resilience is in cooking and baking.  I try and fail and modify and try again . . . and most of the time even the “failures” are edible.  Perhaps “resilience” isn’t a personality trait so much as a type of sign.  Perhaps the trick is to identify those areas in our lives in which we are willing to try and try again, even in the face of failure.  And perhaps, lack of resilience in a particular area is a sign that it really isn’t what we are meant to be doing . . .

I’ll be chewing on this thought some more . . . 🙂

Opening definitions from: “resilience, n.”. OED Online. March 2013. Oxford University Press. 30 April 2013 <http://www.oed.com/view/Entry/163619?redirectedFrom=resilience>.

P.S.  I find it interesting that the definition of resilience now considered “obsolete” included the notion of “recoiling” . . . a reminder of the more mechanical and physical aspects of the term and a hint that it can be protective (as in recoiling from a dangerous thing) . . .

Share

Testing Slideshow with Two Months of Baking

Two months since my last post!  Sorry about that.  It’s not that I haven’t been baking, working on sorting out my food allergies, etc.  I just haven’t had the time or energy to write about it . . . Here’s a slideshow of some of my baking efforts.  I will try to add a few posts to summarize the highlights.

[slideshow_deploy id=’877′]


And a second slideshow of non-baking efforts:

[slideshow_deploy id=’882′]

Share

Holiday Cookies

I’ve been baking up a holiday storm full of gluten-free, dairy-free, corn-free, (and a few VEGAN) holiday treats.  Two of the cookie recipes turned out yummy enough to share here (the rest, including my favorite Spritz Cookies, are still “under development”).

The Joyous Ginger Snaps crackle and crunch, just like they should.

The Oatmeal-Craisin Cookies (GF & Vegan) are wholesome and festive.

Enjoy!

Joyous Ginger Snaps (gluten-free and dairy-free)

Ginger Snaps

Adapted from Joy of Cooking (1964/1973) by Irma S. Rombauer and Marion Rombauer Becker and Gluten-Free Baking Classics by Annalise Roberts

“Like ‘boughten’ ones in texture, but with a dreamy flavor.” (JoC, p. 602)
Yield: About 4 Dozen, 2-inch Cookies

Ingredients

  • 6 Tablespoons palm oil shortening
  • 2 teaspoons water
  • 1 cup sugar
  • 1-3/4 cups GF Brown Rice Flour Blend
  • 1/4 cup sweet rice flour
  • 1 teaspoon guar gum
  • 3/4 teaspoon baking soda
  • 1/4 teaspoon salt
  • 1 teaspoon powdered ginger
  • 1/2 teaspoon cinnamon
  • 1/4 teaspoon cloves
  • 1 egg, well-beaten
  • 1/4 cup molasses
  • 1 teaspoon vinegar
  • 2-4 oz. candied ginger pieces, finely chopped
  • granulated sugar

Directions

  1. Preheat oven to 325°.
  2. Cream together shortening, sugar, and 2 teaspoons water.
  3. Stir in egg, molasses, and vinegar.
  4. In a separate bowl, whisk together flours, gum, soda, salt, and dry spices.  Gradually add to shortening mixture.  Mix until blended.
  5. Add candied ginger pieces.  Mix until blended.
  6. Form dough into 1/2-inch to 3/4-inch balls.  Roll each ball in granulated sugar and place on greased cookie sheet.
  7. Bake 14-16 minutes in a 325° oven.  Cool on racks.

“As the ball melts down during baking, the cookie develops the characteristic crinkled surface.” (JofC, p. 602)

Note: For those unfamiliar with candied ginger, it looks like this before chopping:
Candied Ginger

GF, Vegan Oatmeal-Craisin Cookies

GF Vegan Oatmeal Craisin Cookies

adapted from Bob’s Red Mill Oatmeal Toffee Cookies (from the GF Rolled Oats bag)

Yield: 30 cookies

Ingredients

  • 1 Tablespoon flax meal and 3 Tablespoons water
  • 1 cup GF Brown Rice Flour Blend
  • 1 teaspoon guar gum
  • 1/2 teaspoon baking soda
  • 1/2 teaspoon baking powder
  • 1/2 teaspoon salt
  • 1 teaspoon cinnamon
  • 1/4 teaspoon ground ginger
  • 1/4 teaspoon ground nutmeg
  • 1/2 cup brown sugar
  • 1/2 cup granulated sugar
  • 1/2 cup shortening
  • 1 teaspoon vanilla
  • 2 teaspoons water
  • 1-1/2 cups GF oats (I used half rolled and half quick-oats)
  • 1 cup craisins

Directions

  1. Preheat oven to 350°F.
  2. Combine flax seed and water in a small bowl.  Stir.  Let sit 10 minutes, stirring occasionally.
  3. In a medium bowl, whisk together flour, gum, soda, powder, salt, and spices.
  4. In a large bowl, cream shortening and sugars.
  5. Add flax mix, vanilla, and water.  Beat well.
  6. Add flour mixture.  Mix well.
  7. Stir in oats and craisins (I do this with a wooden spoon rather than the mixer).
  8. On greased (or parchment covered) cookie sheet, place 1 Tablespoon balls of dough spaced 2-3″ apart.  Bake for 18 minutes.  Cool on sheet, then move to rack.


The Gluten-Free Brown Rice Flour Blend I use is:
6 parts Superfine Brown Rice Flour (from Authentic Foods)
2 parts potato starch (not potato flour)
1 part tapioca starch

So, for 3 cups of the blend you would use:
2 cups Superfine Brown Rice Flour
2/3 cup potato starch
1/3 cup tapioca starch


Copyright © 2012 Lucinda DeWitt

Share