Cranberry Orange Nut Quick Bread

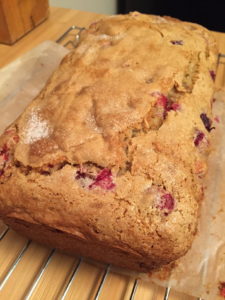
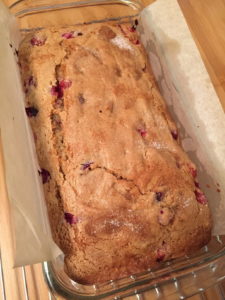
Gluten-free Dairy-free Cranberry Orange Quick Bread

The refreshing taste of orange combines with the tartness of cranberries to make a delicious breakfast bread that’s good enough to be dessert too!!

[adapted from the Cranberry Nut Bread recipe in Annalise Roberts’ Gluten-Free Baking Classics, Second Edition, 2008]

Cranberry Orange Nut Bread

Ingredients

  • 2 cups flour (I use Bob’s 1:1 Gluten Free Baking Flour) (see note below)
  • 1 cup sugar
  • 1 teaspoon baking soda
  • 1 teaspoon cream of tartar (see note below)
  • 1 teaspoon salt
  • 1/4 cup oil
  • 3/4 cup orange juice
  • 1 egg, well beaten
  • 2 cups fresh cranberries, coarsely chopped (may use frozen berries)
  • 1/2 cup finely chopped walnuts
  • 1 Tbs. orange zest (optional)

Instructions

  1. Preheat oven to 350° F.  Grease a 9×5″ loaf pan then line it with parchment (see note below). Lightly grease the parchment (not absolutely necessary but helps prevent sticking).
  2. Whisk all dry ingredients together in a large bowl.
  3. In a separate bowl, combine oil, orange juice, egg, and orange rind (if using).
  4. Pour wet ingredients into dry ingredients, stirring to mix just enough get everything moistened.  Carefully fold in the nuts & cranberries.
  5. Spread into your prepared loaf pan.  Sprinkle some granulated sugar on top (optional but gives a yummy crunchy top).
  6. Bake for 50 – 60 minutes, rotating at about the 30 minute mark. Test for doneness with a toothpick. It should come out clean.
  7. Let pan sit on wire rack for about 15 minutes, then lift bread out of pan with parchment handles and cool completely before slicing.

Notes

  • Bob’s 1:1 GF Baking Flour contains xanthan gum.  If you are using another blend that does not contain gum, add 1 teaspoon of either xanthan or guar gum to the dry ingredients.
  • I no longer use baking powder because most brands contain corn starch (and I have a corn allergy).  I use a blend of baking soda and cream of tartar as a substitute.  If you don’t have cream of tartar and do have baking powder and baking soda you can use 1-1/2 teaspoons baking powder plus 1/2 teaspoon baking soda in place of the baking soda and cream of tartar listed in the recipe above. Send me a message if you want the formula for baking soda + cream of tartar = baking powder.  It’s a bit complicated because the corn starch is just a filler, so you’re really only replacing the other aspects of the baking powder.
  • If you use an 8″x12″ piece of parchment it will fit nicely and give you “handles” on the sides to help remove the bread from the pan later.

©2018 Lucinda DeWitt

Share

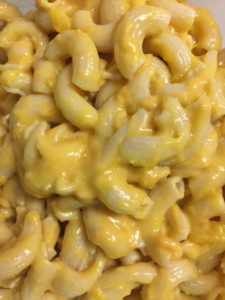
Butternut Squash Mac and Cheese

Butternut Squash Mac and Cheese

Butternut Squash Mac and Cheese

Is anyone else feeling the need for comfort food?  I sure am!!

A few weeks ago my sister made the “Lightened Up Squash Mac and Cheese” recipe from The Chew website and cookbook.  It looked yummy, but I only had a tiny bite (because gluten and dairy).  Ever since I’ve been wanting to try a gluten-free and dairy-free version.  Made it tonight.  Excellent!!

Butternut Squash Mac and Cheese (gluten-free and dairy-free)

adapted from http://abc.go.com/shows/the-chew/recipes/lightened-up-squash-mac-and-cheese-clinton-kelly

Serves 4-6
Time to prepare: 45 minutes

Ingredients

  • 1-1/2 cups cubed butternut squash
  • 5/8 cup stock (chicken, veggie, or turkey, whatever you have)
  • 3/4 cup milk (I used diluted coconut milk, but any milk should do fine)
  • 1 clove garlic, minced
  • 1 cup shredded “cheddar style” non-dairy cheese (I use Daiya brand), divided
  • 1/2 pound elbow-style rice noodles (I used Tinkyada brand)
  • 1 tablespoon shortening
  • 1/2 cup gluten-free breadcrumbs (I used 4C brand)
  • 1 teaspoon Italian herb seasoning (or combination of basil, oregano, marjoram, rosemary)
  • 2 tablespoons chopped fresh parsley (or 1 tablespoon dry) (optional)
  • kosher salt and freshly ground black pepper


Directions

  1. In a medium saucepan over medium-high, add butternut squash, stock, milk and garlic. Bring to a boil and then reduce to a simmer until the squash is tender (about 20 minutes).
  2. Meanwhile, bring a large pot of salted water to a boil. Cook the pasta according to the package instructions.
  3. Once the squash is tender remove from heat. Season with salt and pepper. Blend using an immersion blender (you may need to transfer it to a deep bowl to prevent splatters). Alternatively, use a regular blender. Blend until smooth.
  4. Stir in about 2/3 of the cheese until melted. Set aside until pasta is ready.
  5. Meanwhile, heat shortening in a medium sauté pan over medium heat. Add breadcrumbs and dried herbs. Cook until golden brown, stirring occasionally. Remove from heat and set aside.
  6. When pasta is done, drain and add it directly to the cheesy squash mixture. Stir until everything is combined and melted. Stir in remaining cheese just before serving.
  7. Serve with the toasted breadcrumbs sprinkled on top. Garnish with chopped parsley (if using fresh).

NOTES:

  • The original recipe uses both Gruyère and Parmesan cheese in equal measure, so feel free to modify as you like.
  • I burned the bread crumbs so served it without them. It tasted great.
  • My mom and I agreed that next time we would prepare it earlier and then bake it in a 300°F oven with some of the cheese and/or buttered breadcrumbs or crushed potato chips on top.
  • The amount of salt will vary according to how salty your “cheese” is. I added 1/2 tsp salt and a shake of pepper to the squash.

Enjoy!!

©2017 Lucinda DeWitt


Share

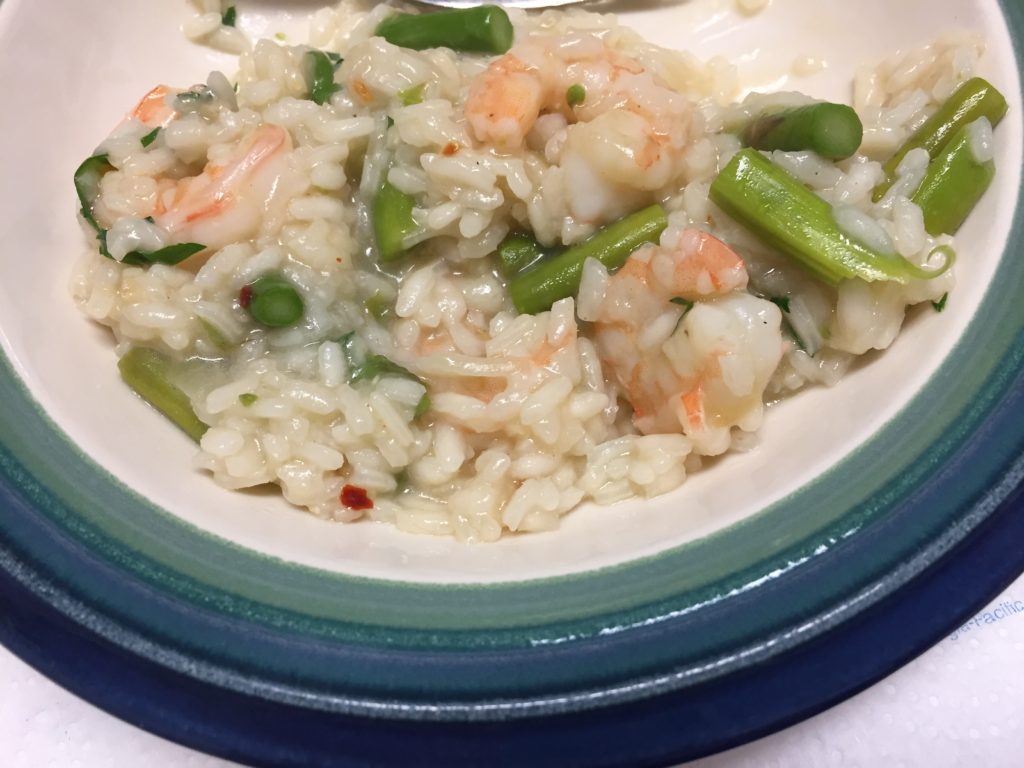
Shrimp and Asparagus Risotto

Shrimp and Asparagus Risotto

Shrimp and Asparagus Risotto

Ingredients

  • 1/2 lb raw shrimp, peeled and deveined
  • 1/2 bunch asparagus, approx 1/2 lb, tough part of stems removed
  • 1 cup arborio rice
  • 4 Tablespoons olive oil, divided
  • 1/2 cup finely minced onion, divided
  • 2 cloves garlic, finely minced, divided
  • 2 Tablespoons finely minced flat leaf parsley
  • 1/2 cup white wine (optional)
  • 4 cups vegetable stock, heated
  • lemon juice, to taste
  • salt and pepper to taste
  • 1/2 cup parmesan cheese (optional)

Directions

  1. Have all ingredients prepped and ready to go before starting. Risotto only takes 22-25 minutes to cook. Remember have the stock hot (never try to make risotto with cold or room temperature stock)!
  2. In a medium sauce pan with a heavy bottom heat 2 Tbls olive oil. Add half of the onion and half of the garlic. Sauté over medium heat until the onion is transparent, about 2 minutes. Stir frequently to keep garlic from burning. Add rice and stir to coat with oil. Sauté until rice is a bit transparent, about 2 minutes.
  3. Add wine, if using, or 1/2 cup stock. Stir. Heat and stir on medium-low until the liquid is absorbed. Continue adding the stock, 1/2 cup at a time, stirring until absorbed before adding more.
  4. Meanwhile, fill a med/large sauté pan with water. Blanch the asparagus for 2 – 3 minutes, drain, cool, then cut into 1″ pieces. Next, in the same pan, heat 2 Tbls oil, sauté the remaining onions and garlic, add shrimp and sauté briefly, 2 – 3 minutes until just barely cooked (they will finish cooking in the risotto). Spritz with lemon juice and remove from heat.
  5. When the risotto is almost done (after 20 minutes taste a piece–it should be creamy and al dente, but not crunchy), stir in the asparagus, shrimp, and parsley. Continue cooking until everything is creamy and cooked through. Add more stock if needed. Salt and pepper to taste and add parmesan, if using. Sprinkle with more lemon juice if desired.

Serve immediately.
Makes 4 servings.

Share

Condiments: Black Bean Sauce and Chili Garlic Paste

Last night I made my favorite Thai dishes: Evil Jungle Prince with Chicken and Eggplant & Bok Choy with Bean Sauce.  United Noodle (my local Asian grocery) was out of the japanese/chinese eggplants (the long skinny purple ones) so I used Thai eggplants (round and green) instead.  They don’t hold together as well in the dish, but it tasted just as marvelous as ever.

I used to be able to buy jars of Chili Garlic Paste and Yellow Bean Sauce that I liked.  But my preferred brand of Chili Garlic Paste is no longer available and the “starch” included in the Yellow Bean Sauce became suspect.  So now I make my own.

Many of the recipes for these condiments that appear online seem to be trying to imitate BAD additive- and preservative-filled versions that you might find in a jar at the grocery store.  They add thickeners like cornstarch and/or gums.  I decided to just stick to the essential flavors and make these sauces as simply as possible.  Here’s what I do:

Chili Garlic Paste

adapted from Sriracha-style hot sauce (latimes.com) and Mark Bittman’s recipe at nytimes.com

Chili Garlic Paste

I combine the ideas from the two recipes cited above and use a combination of dry and fresh chilies, soaked in boiling water with a few cloves of garlic and then pureed in food processor with salt, sugar, and some oil.  If I’m going to use the paste within a day, I just store it in a glass bowl until I need it.  If I’m going to store any of it, I heat it first (in an attempt to kill off any bacteria from the fresh garlic and chilies) and then store in the freezer.

Here are the proportions I used most recently:

  • 3 large mild dry chiles (e.g. Guajillo), stems removed
  • 6 small hot dry chiles (e.g. Szechuan), stems removed
  • 4 fresh chiles (Thai, serrano, or jalapeño), stems removed
  • 6 cloves garlic, peeled
  • 2-3 Tablespoons oil (sesame, canola)
  • 1 Tablespoon sugar (white or brown)
  • 1 teaspoon salt
  1. Put the chiles and garlic in a small bowl and cover with boiling water.  Soak for about 30 minutes.  Drain, reserving some of the water and seeds.
  2. Cut the larger chiles into smaller pieces.
  3. Put all the ingredients into a food processor, blender, or mini-chopper.  Purée until smooth, adding oil or water if needed.
  4. Heat in small saucepan over medium heat until bubbly.  Will keep for several days in the refrigerator or longer in the freezer.

Black Bean Sauce

adapted from recipes from Closet Cooking and Mastercook II

I haven’t found a good explanation of the difference between Thai Yellow Bean Sauce and the more familiar Black Bean Sauce.  I do enjoy Black Bean Sauce, so even though it probably makes my Thai dish more “fusion,” I decided to use Black Bean Sauce in the Eggplant & Bok Choy dish instead of Yellow Bean Sauce that contains “starch” of undefined origin.

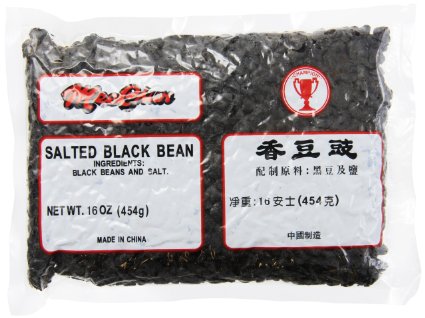
The most difficult part of making your own Black Bean Sauce is finding Salted Black Beans.  I get mine at a local Asian market in a bag that looks like this:

SaltedBlackBeans

Note that these are not the same as the black beans you would use for mexican food.  They are fermented in salt.  I store mine in the freezer.

  • 1/2 cup fermented/salted black beans
  • 1/4 cup water
  • 2 cloves garlic, minced or pressed
  • 1 Tablespoon sesame oil
  • 1 Tablespoon gluten-free Tamari
  • 1 teaspoon sugar
  1. Place fermented/salted black beans in a small saucepan and add water.  Leave to sit to rehydrate the beans (approx. 30 minutes, can be done earlier in the day).
  2. Add all the remaining ingredients.
  3. Heat over medium heat until bubbly and thickened.  Stir occasionally.


Share

Indian Comfort Food

Those of us with food sensitivities often are confronted with social food situations where we know “if I eat any of this, I’ll be sorry later” . . . but we want to be polite.  So we pick the things that seem “relatively safe.”  I’m pretty good at avoiding the likely culprits.  And lucky for me, I won’t end up in the hospital if I am accidently exposed to gluten, dairy, or corn.  But that doesn’t mean I won’t suffer: intestinal distress (gluten), sinus trouble (dairy), hives (corn).

My choice when I need to rebalance and cleanse my system is what I call Indian Comfort Food, two ayurveda-inspired porridges that soothe and restore: Kichari (aka kitchari, khichdi, and many other variations) and Savory Farina.  Try one or both of these recipes and your body will thank you!  (Recipes adapted from information obtained at an Ayurvedic Cooking class at Health Through Ayurveda.)

Kichari

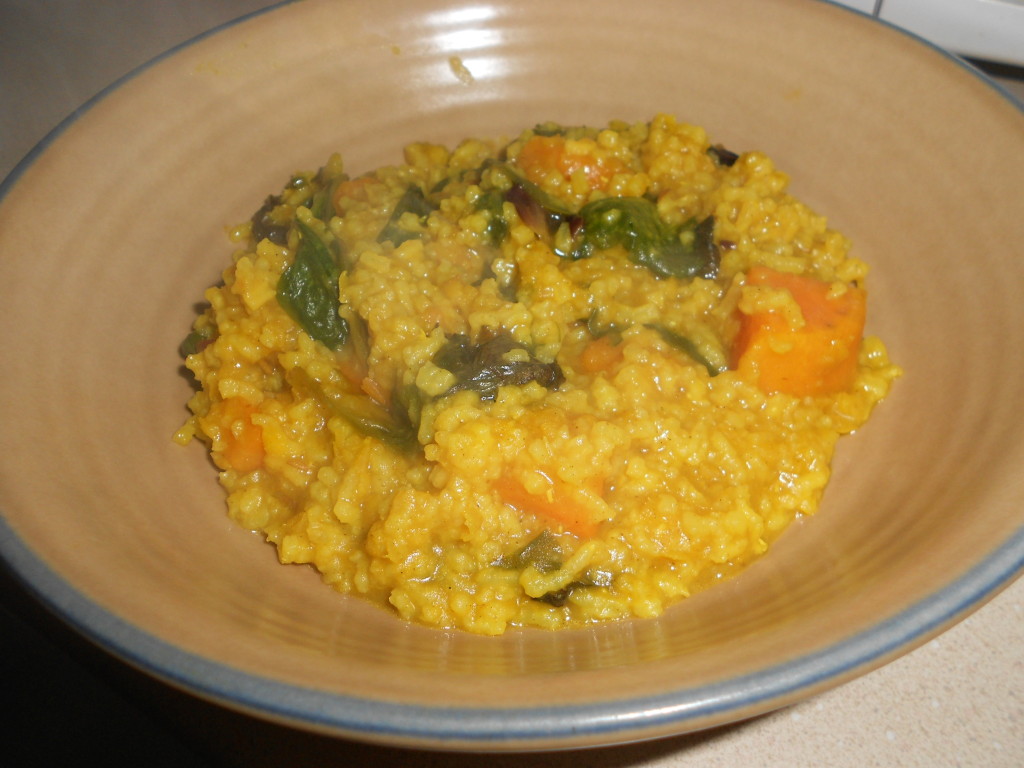
Kichari with Sweet Potato and Chard

Ingredients

  • 1/2 cup split yellow lentils (moong dal) or red lentils (masoor dal)
  • 1 cup white basmati or long-grain rice
  • 6 cups boiling water
  • 1-2 Tablespoons oil or ghee (I use coconut oil)
  • 1 teaspoon cumin seeds
  • 2 Tablespoons fresh ginger, grated
  • 1 pinch baking soda
  • 1 teaspoon ground cumin
  • 1 teaspoon ground coriander
  • 1 teaspoon turmeric
  • 1 cinnamon stick (or 1/2 teaspoon ground cinnamon)
  • 8 cloves (or 1/8 teaspoon ground cloves)
  • 10-12 cardamom pods (or 1/4 teaspoon ground cardamom)
  • 1 large sweet potato, peeled and chopped into bite-sized pieces
  • 4 cups chard (swiss, red, or rainbow, about 1/2 bunch), stems removed, sliced or torn into bite-sized pieces
  • Salt to taste

Directions

  1. Rinse split lentils until water runs clear. Soak 4 hours or overnight; drain and rinse.
  2. Get water boiling if it isn’t already.
  3. Warm oil in large sauce pan or Dutch oven. Add cumin seeds and ginger and sauté for 1 minute. Add drained lentils. Sauté for another few minutes. Add 4 cups of boiling water and pinch of baking soda. Bring to a boil and then turn down heat to low. Cover and simmer for 20 minutes.
  4. Meanwhile measure out remaining spices (cumin, coriander, turmeric, cinnamon, clove, cardamom), prepare sweet potato, and rinse rice.
  5. When beans are mostly cooked (after about 20 minutes), add rice and sweet potatoes. Add remaining 2 cups boiling water.
  6. In a separate small pan, heat 1 Tablespoon oil. Add spices. Warm over low heat just long enough to release aroma. Be careful not to burn.  Add to bean/rice/sweet potato mixture.
  7. Continue cooking at a simmer until rice is done, 20-30 minutes, stirring occasionally.
  8. Add chard. Cook until greens are wilted and combined with the rest of the ingredients (5-10 minutes).
  9. Salt to taste.
  10. Enjoy!

[slideshow_deploy id=’1105′]

Notes

  • The original recipe called for a pinch asafoetida (hing) added with the cumin seeds.  I tried to find hing that didn’t also include gluten and/or corn starch.  Unfortunately, my body reacted to the one product I found that said it was gluten-free in a way that told me there was something in it that I shouldn’t be eating . . . so even though this is a traditional “healling” ingredient in Indian/Ayurvedic cooking, I omit it.
  • If you can’t find small split lentils, you may be tempted to use regular split peas (yellow or green).  Unfortunately, those require MUCH longer to cook.  I’m really not sure how to best modify this recipe to use them.  There may be other kichari recipes on the web that use those larger split peas. (See slideshow above for a picture comparing the different types of lentils.)
  • Kale, spinach, or other leafy greens can be substituted for the chard.
  • Sometimes I heat all the spices at the beginning (with the cumin seed and ginger) rather than waiting until later.  The flavor is a bit different and there’s a greater danger of burning the spices, but it can work (and leaves one less pan to wash and frees up one more burner).
  • The original recipe claimed that this recipe “Serves 2-3.”  I usually get 5-6 serviings out of it.
  • [2021 update] I never figured out what the baking soda was supposed to be doing, so I now omit it and add 1/2 tsp of Ajwain instead. Ajwain is an Indian seed that “tempers the effects of a legume based diet” 🙂

Hearty Breakfast Farina (Uppma)

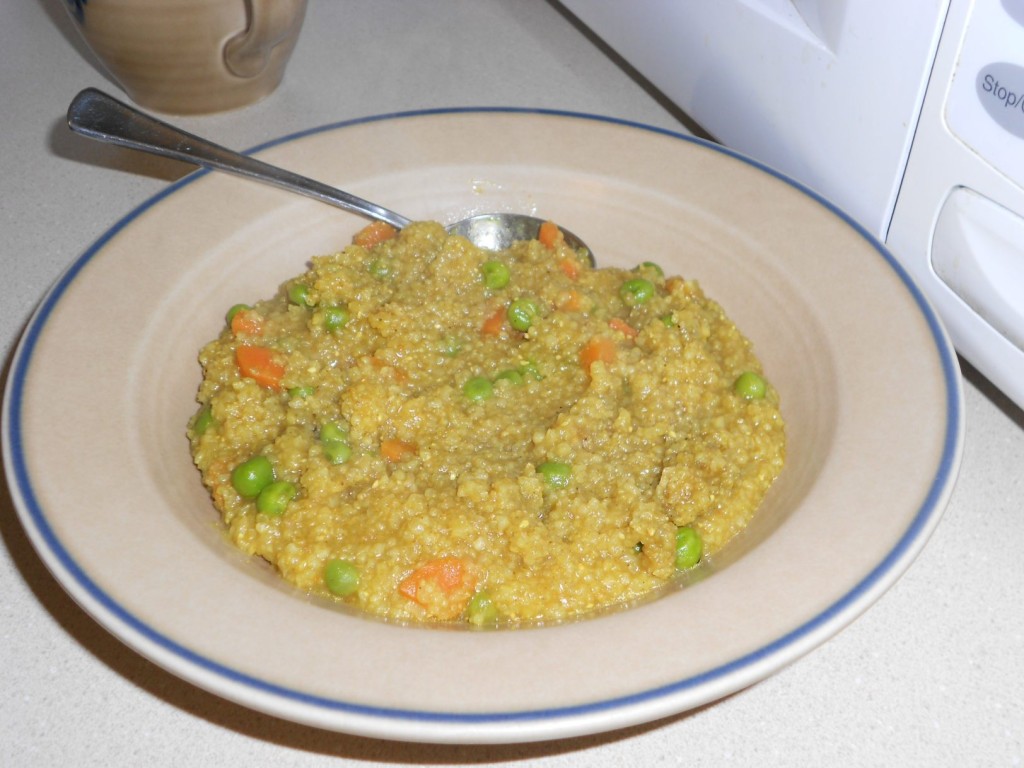
Savory Hot Farina

Ingredients

  • 1 cup boiling water
  • 1/4 cup brown rice farina (I use Bob’s Red Mill “Creamy Brown Rice Farina”)
  • 1/2 cup vegetables (I use 1/4 cup finely chopped carrots and 1/4 cup frozen peas)
  • 1-1/4 tsp Breakfast Spice Blend (see below) (OR 1/2 tsp coriander, 1/4 tsp cumin, 1/4 tsp turmeric, and 1/4 tsp cinnamon)
  • 1 Tablespoon coconut oil or ghee
  • Salt & Pepper to taste

Directions

  1. Start the water boiling in your kettle.
  2. In a small cast iron or non-stick pan over medium heat, lightly the brown rice farina, stirring frequently until the farina is light brown in color.  Remove toasted farina to a bowl and set aside.
  3. Melt the coconut oil or ghee in the pan over low heat.  Add the Spice Blend.  Let spices warm for 10-15 seconds.  Add vegetables and a small amount of water.  Stir. Cover and cook vegetables for 5-7 minutes.
  4. When the vegetables are cooked, add the toasted farina and stir to coat.
  5. Add 1 cup boiling water and a dash of salt.
  6. Cook for approximately 5 minutes, stirring frequently as farina thickens.
  7. Enjoy with a cup of Chai Tea!

Breakfast Spice Blend (makes approx 1/4 cup, enough for 6 individual servings)

  • 2 Tablespoons ground coriander
  • 1 Tablespoon ground cumin
  • 1 Tablespoon ground turmeric
  • 1 Tablespoon ground cinnamon

Combine all the spices in a glass jar.  Use 1-1/4 teaspoons (or a heaping teaspoon) for each serving.

Notes

  • I’ve only made this dish one serving at a time, but it should work if the ingredients are doubled/tripled/quadrupled.  You might need to adjust water quantity, spice quantity, and/or cooking times.  [2021 update] I now always double this recipe (so 2 cups water, 1/2 cup farina, 1 cup veggies, 2-1/2 tsp spice blend all in a slightly larger pan or sauce pan). Works fine and somehow doubling gives me 3 servings instead of two.
  • Other vegetable options: chopped onion, minced ginger, chopped yam or sweet potato, asparagus, leafy greens, or whatever else sounds good.
  • I’m guessing this dish could be made with other grains (e.g., wheat farina or grits), but I haven’t tried that.  You might have to adjust cooking times.
  • [2021 update]  I’ve also made the double recipe with 2 cups of leftover cooked rice instead of the farina (reduce the water).  And I sometimes throw in a couple of scrambled eggs to make a really yummy Rice Bowl.

WOW!  That’s quite a bit of information.  Please let me know (in the comments) if anything needs clarification.

Share